27 September 2012
Watercoloured Beautiful Season Part 1
I just did a quick comparison colouring in the bird from this set on Naturals Ivory & watercolour paper - you can watercolour with the Naturals Ivory as it has a higher cotton count than our standard papers & before you ask no I haven't tried as yet on our new Naturals White (that can be part 3).
To me there was no comparison, the watercolour paper won hands down & I only hope my photo for Part 2 shows what I can see in real life, which are deeper & more vibrant colours.
Stamp set: Beautiful Season
Ink: Stazon Black
Paper: Naturals Ivory, Cherry Cobbler
Other: Watercolour crayons, aquapainter, Crystal Effects (on the veins of the holly leaves), Cherry Cobbler Dazzling Details (on the berries), Cherry Cobbler Scallop Tulle ribbon (just gorgeous to tie), Northern Flurry embossing folder, Cherry Cobbler marker & spritzer - just got to love how everything co-ordinates - I personally think this is one of the best features of SU! apart from the quality of their stamps!
21 September 2012
Christmas Stamp a Stack (& big Garage Sale)
The WOW paperKRafters are going to try something different this year for our Christmas team event - a stamp-a-stack
COST: $25 for one dozen cards (making four of 3 designs)
WHEN: Saturday 13th October 1-5pm
WHERE : West Harbour
PLUS THERE IS MORE a combined garage sale of all the demonstrators helping on the day, many of the retired stamp sets are less than half price so shout yourself an early Christmas present too.
AND EVEN MORE show n' tell i.e.a few demos of some of the new products & how to use them whilst we have a wee break mid afternoon.
Contact me if you'd like to reserve your seat & for all the finer details but I'm sure you'd agree $25 for 1 dozen cards is pretty phenomenal value.
Well I'm not sure how the other designers are going but I think this maybe my design & I really like it & I think this stamp set is perfect for us in New Zealand with the pine needles etc.
Stamp sets: Watercolor Winter, Greetings of the Season
Ink: Lucky Limeade, Cherry Cobbler
Paper: Naturals White, Lucky Limeade, Cherry Cobbler
Other: Cherry Cobbler Dazzling Details (love, love it!) and Cherry Cobbler Baker's Twine, mini glue dot
Hope to see some of you on the 13th if not before :)
20 September 2012
Auckland Heartfelt Event with Stampin' Up! Part 3
and this will be my 3rd & final post on the event that took place last Saturday. I'll resume sharing some card KReations from tomorrow onwards. Wow when I look back at all the photos I took on the day I just see so much inspiring stuff it really was "priceless" being part of the event. The card below was created by my dear friend Donna for the share board (after midnight she tells me) & I couldn't get over how perfect it was - I thought she had drawn all the embellishments in by hand - well she fooled me I have since discovered these are actually designer series papers in the Snow Festival DSP pack.
I have also discovered a cool new FREE photo-editing programme tonight which makes fun collages so it may be good bye to Photovisi & hello to PhotoScape from now on. It sure is a good way to share a lot easily now I have mastered it.
Anyhow enough ramblings - let the pictures do the talking!
18 September 2012
Auckland Heartfelt Event with Stampin' Up! (part 2)
Just a few more ramblings & photos of the awesome day I had on Saturday with the team from Stampin' Up! at the Auckland Heartfelt event and fellow demos from around NZ & friends - one of the bestest things is we get to play a lot & to play we need stamps - this year we were given as our set to take away Clockworks (which was right up there on my wishlish) & a surprise Heart of Christmas which I know will get used a lot. Just a very quick post of 2 of the 4 projects we made on the day - I actually got 3 of the 4 projects KReated which must be a first for me as I'm normally too busy talking!
Up above is the covered notepad we created - even if I say so myself mine looks pretty much like the project sample photo ;)
And the next project we created was a wee box made with the Two Tags die which will be awesome for doing Christmas notecards & don't you love the in-colour dahlias they make me squeal with delight!
Looks like there will be a part 3 & maybe even a 4 report - I was a busy wee snapper - so I'll catch you later.
17 September 2012
Auckland Heartfelt Event with Stampin' Up! (part 1)
Heartfelt = Happy Ecstatic Artistes Raring To Frolic Expressively (with) Laughter (and) Team-mates but in all honesty a fun day playing with stamp, ink, paper, lots of new products & seeing lots of cool new ideas whilst catching up with other demos & friends from around the North Island arranged by Stampin' Up! NZ and we got new stamps to take away too :))
These are just some of my recollections & photos of the day - this is part 1 as it's very late now.
The first thing that was WOW-tastic was Sarah who was greeting & handing out our bags at the door - it was like double take am I seeing right but yes a dress made of topnote PAPER die cuts - fantastic!
As you all know I made a name badge which ended up being a choker for me on the day - I blogged it's KReation about a week ago but I snapped a few others that I thought looked pretty damn good; these lovely 4 ladies are all friends from my team.
Top L-> R : Ria Kaire, Sally Williams
Bottom L-> R : Callena Lewis, Debbie Lamb
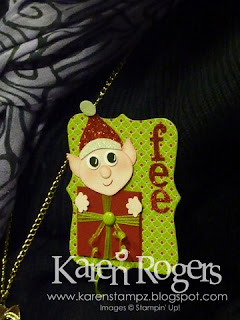
And my favourite one from the day was the wee elf of Fee's - isn't he cute!!!
And a name badge that looks like a ornament - so cute too Shona & don't you love the Champagne glimmer paper - scrummy!
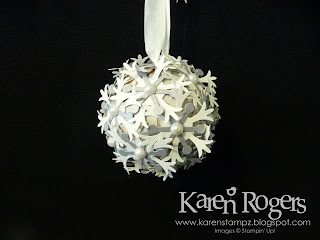
I'll just share a few ornaments & displays from around the room before bed for me.
More ramblings & piccies coming your way in a day or 2 in part 2 - for those that shared so much at the event thank you so very much you certainly fulfill my definition of heartfelt!
12 September 2012
Clean & Simple Butterfly
I love my new Elegant Butterfly punch it is so pretty. I saw awhile back from a very talented US demo (Debra Currier) a lovely card using the Beautiful Wings Embosslits & our also new Fancy Fan folder & bookmarked it away for when our catalogue was released. I really am liking all the white on white cards out there in the blogging world, lovely nice clean look.
Stamp set: Itty Bitty Banners
Ink: Midnight Muse
Paper: Whisper White, Raspberry Ripple, Primrose Petals, Gumball Green
Punches: Elegant Butterfly, Itty Bitty Shapes
Other: Fancy Fan EF, Little Leaves Sizzlit, basic pearl, dimensionals, Delicate Designs EF (I've dry embossed the butterfly with this), Adorning Accents edgelit, Bitty Banners framelit
10 September 2012
More Betsy
This time KReated by Vanita Hurbuns and she managed to get all the NEW in-colours on her card & not look garish & I love her fancy edge with all the flowers.
Stamps: Betsy's Blossoms, Petite Pairs (sentiment)
Ink: Raspberry Ripple, Primrose Petals, Summer Starfruit, Gumball Green, Midnight Muse
Paper: Summer Starfruit, Whisper White, Primrose Petals
Accessories: Rhinestone basic jewels, Tombow, dimensionals
Tools: Paper snips, Large oval punch, Oval Scallop punch, Itty Bitty punch set
Thanks Vanita a lovely fun & fresh card.
9 September 2012
My name is Karen ;)
Next week all the demos from the top half of NZ are getting together with Stampin' Up! to have an all day play & learn about our new products.
We were asked to make our own name badge for the event & here's my badge modelling itself on my Spice Cake fabric bag that my scoring tool lives in - it looks so damn good together I may have to take it to the event as my handbag.
I must be the only demo that has never made a paper flower with the Scallop Punch & I used our smaller version we can now buy 1-1/4" & followed this helpful tutorial of Anne Krashel's "how to."
I used Very Vanilla card stock & then Gold Glow Smooch Spritz to make the flower & the "Little Leaves" pretty.
If anyone wants to attend this fabulous day with me registration closes tomorrow so I'd probably need your credit card details as my bank account is looking rather sad as I was TEMPTED by all our fabulous new stamps etc too much.
CONTACT ME here if you are interested in attending.
WHEN: Saturday 15th September 10-5pm being held in Greenlane, if anyone wants to attend guests are welcome & no business talk is happening just playing!!
Agenda/Activities:
Product Playground:
Experience hands-on learning and a chance to see and try Stampin’ Up! products—including some of our latest releases. Have a go at various techniques and see project displays created by our talented demonstrators.
Make & Takes (Clockworks Stamp Set)
Registration includes a Make & Take kit and the Clockworks Stamp Set (valued at $41.95 wood-mount / $33.95 clear-mount) from the new annual catalogue. The kit includes materials for four cute projects and tips on how to make them. All supplies will be provided by Stampin’ Up! Spend as much or as little time as you want to create your Make & Takes—whenever you like!
Inspiration Boards.
Our Share Boards will provide an opportunity for you to show off your creativity! Add your own project to the boards and gain inspiration and ideas from all of the share projects. Presentation projects and a variety of other projects will also be on display, so be sure to bring your camera!
Demonstrations:
Be wowed by a variety of creative presentations throughout the day.
Presentations:
Decorations
Heartfelt Cards
Packaging and Wrapping Ideas
Handmade Gifts
Fee : The $120 fee provides you with access to all activities and presentations at the event, lunch, the Make & Take kit and Stampin’ Up! products (including the Clockworks Stamp Set and more)!
8 September 2012
Lisa's ornament card
I just love Lisa Bullock's from Christchurch demo swap I received recently - it sure makes me think about the "fun" I have untangling my Christmas lights & every year I say I will do better!
Lisa is one clever lady & she can do things with punches that are pretty damn amazing.
Lisa says "All you need are two punches, Boho Blossoms and Blossom Petals Builder (not the Build a flower punch like I said above…* blush*) and with some careful snips and swish of a Basic Black Stampin’ Write marker you have Christmas Lights".
Stamp set: Curly Cute
Ink: Gumball Green, Raspberry Ripple, Midnight Muse, Basic Black marker
Paper: Gumball Green, Pool Party, Primrose Petals, Very Vanilla, Be of Good Cheer DSP
Punches: Build a Blossom, Boho Blossoms
Other: Apothecary Accents framelits, Woodgrain embossing folder, Gumball Green stitched satin ribbon, matpack, sponges
Gosh did I feel spoilt receiving this in the post (huge thanks Lisa) - just imagine how your loved ones would feel receiving it too!
Inky hugs,
5 September 2012
My open home launch: food, cards & friends
"Hello" & if you're like me you're waiting for a BIG box of goodies from Stampin' Up! to play with now we can truly order.
I thought I'd share another card the attendees got to KReate at the event & also huge congratulations to Jan Baxter who won the door prize of the 2012-14 In-Colour Markers. The 3rd card on the day was a case of my demo swap from Debbie Lamb & it was perfect for a make n' take & a huge plus used up my less favourite new in-colour (I am heard to mutter Karitane Yellow in an unflattering voice). I also really liked the wee vellum strip.
But before we see the whole card some piccies from the day/night & a link to the chocolate chip cookies recipe.
Stamps: Betsy's Blossoms, Tiny Tags
Ink: Raspberry Ripple (this is my favourite new colour), Summer Starfruit
Paper: Raspberry Ripple, Summer Starfruit, Whisper White, Floral District designer series paper, white Vellum cardstock
Other: Bitty Banners framelits (use tab 2 on the Big Shot), dimensionals, basic jewels, Tombow Glue
Cutting measurements:
Summer Starfruit A5 cardstock, Raspberry Ripple, 9.5 x 13.8cm, DSP 9 x 13.3cm, Vellum 9 x 1.5cm, scrap of Whisper white
This is a great idea to use up left over DSP with one focal image so thanks Debbie for a great swap (again). I also whipped up a quick thank you card with using one of the other designs of DSP, Primrose Petals ink, Midnight Muse ink & card stock, Gumball Green ink.
1.
3 September 2012
Introducing Papaya Collage
This was one of the cards that everyone made at my launch party & I've shared a few of these with fellow demos in the last week too, talk about fast to create & loving the new Vintage style stamps in our new catalogue. I was inspired by Deena Boos & tweaked her original design a wee bit to work with what I had. So big thanks Deena the card was a huge success.
Stamps: Papaya Collage, En Francais (background)
Ink: Soft Suede, Crumb Cake, Primrose Petals
Paper: Primrose Petals, Soft Suede, Natural Ivory, Very Vanilla
Other: Sponge, Crumb Cake seam binding ribbon, 1-3/4" bow maker, dimensionals, cutter tool (retired), spritzer, Soft Suede marker, mini glue dots
Cutting instructions:
Primrose Petals A5, Soft Suede 10 x 14.3cm, Natural Ivory 9.5 x 13.8 cm, Very Vanilla 2-1/4" x 3" (two pieces)
1. Ink up En Francais with Crumb Cake (take the pad to the stamp & tap all over), stamp on the left hand side, repeat to fill in the approx. 1" blank piece on the right hand side - don't worry if it overlaps. It disappears when the frame is stamped on.
2. Stamp the frame from Papaya Collage in Soft Suede - see photo for placement.
3. Distress the edges with the cutter tool (or use the blade of your scissors) and sponge with Soft Suede or Crumb Cake around the edge.
4. On one piece of Very Vanilla stamp the rose image with Primrose Petals - stamp lightly this is a NEW style pad & is "juicy". On the other piece stamp the fern in Crumb Cake & the thrush with Soft Suede - the bird is just peeking in. Distress & sponge the edges & you can also spritz with a Soft Suede marker.
5. I have just adhered the layers together with no dimensionals and to me they jump out as is - but you are welcome to use dimensionals if you want too. Adhere the rose though with a dimesional & the Crumb Cake bow with a mini glue dot.
Many thanks to those that attended my launch parties & I am very excited about the new stuff so hope we have a lot of fun exploring & learning together with them.
Subscribe to:
Posts (Atom)