Showing posts with label Box. Show all posts

20 April 2023

Back to basics

Can you remember when we used to make boxes without dies, I surely can. In fact for quite a few years when I was a Stampin' Up! demonstrator I named myself the Queen of Boxes. But when dies came along I embraced them fully and their perfectly cut and scored lines.

Well it was back to basics for this box card, one of the projects at last years SCT Crop and Create event which we received from Crafters Companion big numbers as stamps and dies plus stamped bunches of balloons, presents, cake and candles. The set was called Happy Birthday (Gemini Pop Up Box stamp and die). Sara Davies was our instructor at the event and she shared lots of tips. We also received a set of Spectrum Noir Tricolour Aqua Floral Meadow set and a stamp set called To Someone Special. So a lot of goodies for a mini one hour class. I haven't used the latter 2 items for this project but still have 2 cards to make. I'm just more comfortable colouring with my Copics and matching them to the colours of the DSP and mat cardstock (Bermuda Bay from SU!)


 There is no sign of the co-ordinating box card die to buy now but I didn't look last year when I received my card kit but it is possible it wasn't available then as we were provided with a template to either print out directly on card stock or trace onto our cardstock. The former would have been great but I felt we were going to see the dotted score lines and tracing sounded really cumbersome. Lots of the ladies that were doing the event converted the template so they could use on their Cricut but I don't own one so I decided to get out my ruler and work it old the old way.

So if you want to have a go this is what you need;
  • TWO pieces of heavy weight cardstock measuring 6-1/2” x 8-15/16”
  • Score at 3-1/2” and at 6-1/8”
  • Flip the cardstock so the smallest score line is at the base, score at 2-5/8"
  • Cut and score (dotted lines are scored) as per the diagram below. 

  • From the offcuts from above cut out THREE pieces of 4-1/4” x 7/8” card and score at each end 3/8” as below:
These form insert tabs to attach the coloured images on strips of acetate (I used my Copics to colour up). I used Hammermill 1001b weight cardstock to make my base box card. 


The card actually lies flat so you can put in a very big envelope; you can obviously make it shorter.


Well that was a fun project for a "special occasion" and I certainly would make this box again for special birthdays.

✿ Karen ✿

4 December 2012

Making old into new


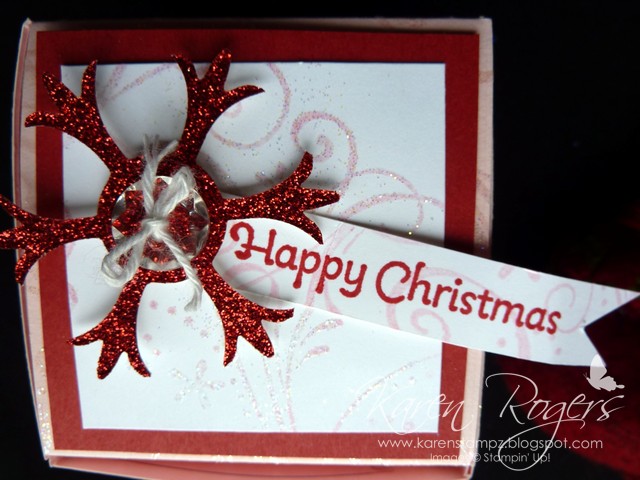
Hi all I'm getting ready for my work's annual craft market this coming Thursday so clearing out all those kits & stuff I have stored in my garage. This 7's box was an Extravaganza project of mine way back in February 2010 for "Valentine's" - well I've got rid of the hearts & added some glitter & blinged it up for Christmas 2012. My original post you can see HERE.


I've used my retired So Swirly wheel, which even though it's now retired from SU! it'll never retire from my stash, as I love it & it's so versatile & I've used my most favourite thing now Irridescent ICE embossing powder.  I used our Illuminate pad as it's a watermark pad that is luminescent in case I missed anywhere & made my box all sparkly. Then a red glimmer snowflake, gorgeous faceted button & voila the soaps & bath bombs are ready for sale to someone as a small gift.


If you haven't had a go at making a 7's box do try them they actually make a substantial wee box with very little effort. If you check out the original post it'll send you off to Marelle Taylor's blog with step by step instructions "how-to".

Well I hope everyone's Christmas preparations are going well I may need a week to tidy up my house ;)

6 July 2011

More butterflies

This is known as the 7's box it is a piece of A4 scored at 7,14,21,28 & 7, 14 cm. I really like it & the fact it makes such a sturdy wee box, this one was filled with heart shaped soaps, a wee stamp & a wee ink pad & was one of the demonstration items I did at a work shop recently.

The card stock has been wheeled with the Kindness wheel to, to make a subtle background.

Stamp sets: Flight of the Butterfly, Kindness wheel
Ink: Riding Hood Red, Pink Pirouette, Stazon white
Paper: Riding Hood Red, Pink Pirouette, Whisper White, Vellum Paper
Punches: Butterfly, scallop oval
Other: Dimensionals, stamp-a-ma jig, acetate, mini glue dots, fire rhinestone brads.


5 December 2010

Sarah's cute birdhouse

This was such a cool, easy project that Sarah taught our team last week at our play day.

We all had different DSP for the roof & they all looked fabulous. Here's my completed one full of mini Santas (it took the whole bag full) & I have to say that our mini clips are really strong & so cute!

11 October 2010

Reuse & recycle

I probably don't need to preach this too hard to fellow crafters but one of my favourite things to recycle is the DSP backing cardboard - it makes 4 very nice 6x6" squares which are the base for my scallop box that the WOW paperKRafters created yesterday at our team training. It was a CASE of one that Rachael Knight sent me for my birthday this year resplendent in Rich Razzleberry - the girls & I all really like our Cherry Cobbler one so a huge thanks Rachael - though I'd appreciate if you use less Sticky Strip next time so I can pull it apart easier! Judy also had a fancy ribbon holder with her yesterday so look at my bow - gorgeous!

Stamp: Medallion (background)
Ink: Cherry Cobbler
Paper: Very Vanilla, Riding Hood Red textured, Cherry Cobbler, Very Vanilla, Jolly Holiday DSP and last but not least the DSP cardboard backing sheet
Other: 2-step large bird, Little Leaves Sizzlit die, Scallop Circle BigZ Die, Old Olive 5/8" grosgrain ribbon, sticky strip, anywhere glue stick, mini glue dots, white Signo gel pen, dimensionals.


Rachael, Vicky-Lee & myself are working at the Dunkley's Craft Show at the North Shore Events Centre on Saturday & Sunday - so do pop in & say hi & buy some of our Christmas goodies - though I don't think you'll see this box out for sale as I love it too much. You can print out this coupon too if you'd like to save on the door entry.

And if you'd like to join a team of like minded ladies do please click on my tab above - Join My Team - the fun we have is too good not to share!

5 September 2010

WOW Team swaps Part III - Lesley's Mambolicious Box

The final installment of my team swaps last weekend - Lesley Stewart made us all an origami box - I chose a Melon Mambo one as it looked so cheery.

She's added a few flowers from the Flower Fancy set and a self-adhesive pearl - this is one of the cool new products we now stock $11.50 for 150 of them in 3 sizes; 2,3 and 5 mm.


21 August 2010

Extra large 2-step bird punch box & tags

I just love the large bird punch - it's so versatile & until the end of August it's only $35.95 (plus shipping). I was always surprised (pleasantly) that it was this price when it was released.

I can share with you now that I have my own copy of our new Idea Book & Catalogue that come September 1st it's increasing in price to $41.50, so if it's on your wishlist now is maybe a good time to get it.


This divided slider box is another fabulous project from Jenny Moors that we made at my home class last night. For those of you that know me I don't do punch art but made an exception for this as it's so fabulous. The attendees made 12 tags to go in their boxes so they mayn't do punch art anymore either!


Stamp set: Tiny Tags
Ink: Rich Razzleberry, Orchid Opulence
Paper: Rich Razzleberry, Orchid Opulence, Old Olive, Whisper White, Cottage Wall DSP.
Punches: Extra large 2-step bird punch, Boho Blossoms, Medium Jewelery Tag, 1-3/4" circle, 1-3/8" circle, handheld 1/16"
Other: Dimensionals, aluminum metal edge tag, rhinestone bards, silver brads, silver cord (retired), 2 way glue pen, mat pack, paper piercing tool, Rich Razzleberry dotted grosgrain ribbon, Sticky Strip

So do remember the retiring list - come Septenmber 1st the extra large 2-step bird punch will increase in price and (sob) Orchid Opulence & Cottage Wall DSP will retire forever. So do contact me if you'd like to order any of them or anything else.

24 June 2010

An easy box for notecards

plus we have bling & its 40% off - I am so glad I forgot to order more fire rhinestone brads after my class the other night as it's on special this week :) If you'd like to order some bling to make your projects pretty, remember the deal closes June 30th.


This wee box fits perfectly 3-4 notecards (3x3") & their matching envelopes and was one of my class projects the other night. You can make a box using 2 (or even 4) scallop envelopes really easily.

Only 2 extra steps are needed for a 2-scallop envelope box: trim the base to 1" horizontally and make 2 side pieces 1" x 2-1/4" - we've embossed ours as the Big Shot was out.


Stamp sets: Cottage Wall, Tiny Tags
Ink: Rich Razzleberry, Old Olive
Paper: Rich Razzleberry, Old Olive, Orchid Opulence, Whisper White
Punches: Medium jewelery tag, 1-1/4" circle, 1-3/8" circle, scallop circle, handheld punch
Other: Fire rhinestone brad, dimensionals, sticky strip, Whisper White notecards, Big shot, Perfect Polka Dots embossing folder

26 April 2010

A box you can post in an envelope!

Wow this is a cool project & is this week's inspiration on NZSU Blogs - it's a simple project that Angie Kennedy Juda shared on her blog that she learnt at her SU! regional training.


This is a great project as this small box which is 3 x 2-3/4" folds up flat for posting/storing & you can easily get one out of a piece of A4 card stock - so very economical. 


I'm starting to use up my soon to be retired card stock colours & I can see why Glorious Green is getting the chop but it does go rather well with Rose Red (colour combination courtesy of my colour coach wheel).

Stamp set: Vintage Vogue
Ink: Glorious Green, Rose Red, Regal Rose
Paper: Glorious Green, Rose Red, Whisper White
Other: Filigree designer brad, dimensionals

14 February 2010

It was a WOW of an afternoon all right!

Hi all - yes I've been quiet on the blogging front (& maybe so for quite a few more weeks) as lots of events on or coming up. Yesterday was the second WOW paperKRafters team event and to all accounts & purposes I think the 30 attendees had a ball - someone even came from Vanuatua to attend but we also had a stamping friend from Hamilton come up too - so thanks Catia & Sarah for going the extra mile all right!!

My project was based around 3 gorgeous heart-shaped soaps so the perfect solution was Marelle Taylor's 7s box!


Stamp sets: A Happy Heart, Sprinkles
Ink: Pink Pirouette, Riding Hood Red, Stazon White
Paper: Pink Pirouette, Riding Hood Red, Whisper White
Other: Acetate, Scallop Oval Punch, Dimensionals, 1/2" circle punch, mini glue dots, anywhere glue stick (so good for boxes), 2-way glue pen & dazzling diamonds glitter, cellophane bag & taffeta ribbon.

No team event would be complete without a cake & I made a Blueberry & Apricot Upside-down cake - the recipe can be found on kareN cookZ and of course door prizes & of course the great demos I work with so do check out the left hand side of my blog for their projects I see Debbie already has her springy thingy card posted - it sure was a real WOW.


If you haven't attended one of these before you don't know what you're missing out on - I'm involved with my bigger team the Creative Inkers & we're staging one in Balmoral, Central Auckland on Saturday March 13th 1-5pm $40 for 4 projects (with $10 credit on the day if you spend over $50) so contact me if you'd like to know more - seats are filling fast!

28 December 2009

Boxes for the bath bombs


I showed on an earlier post some acetate boxes to put in my bath bombs but with Christmas rapidly approaching I resorted to the 7s box of Marelle Taylor which is so quick & easy.

A bit of packaging & done - 2 more pressies (tick). Here's the top of the 2 boxes:


Stamp set: Snow Swirled, Winter Post, Curly Label Punch
Ink: Real Red, Certainly Celery, Old Olive, Stazon white
Paper: Real Red, Certainly Celery, Old Olive, Whisper White, "acetate", Ski slope DSP (retired

This is what the bath bombs looked like before being packaged up, they're easy to make & the recipe is courtesy of Sandy Miller a La Reve consultant with "my modifications"


  • 1 cup baking soda
  • 1 cup citric acid
  • 1 Tbsp La Reve Angel Mist Body Oil Mist (or replace with 1 Tbsp almond oil & approx. 10 drops of essential oil)
  • Liquid food colouring
Sift dry ingredients & mix well , add wet ingredients & mix. Add to silicone small moulds that you'd use for ice-cubes etc - I have a butterfly set & a heart set. The mix makes about 3 tray fulls ~3 dozen. Press the mix into the mould until can't add anymore. Leave overnight & then push out. They take about another day to dry properly.


19 November 2009

Christmas Crackers


I've seen a few of these popping up on blogs lately & this has certainly been a real favourite at my classes & workshops  with all.  If you'd like to schedule your own home workshop & learn how to create these with ease contact me ASAP as I don't have many free slots left.

The cutting & scoring is a breeze with our paper trimmer which has the option of a cutter & scorer refill, but you can also just use your bone folder in the cutting groove but for speed & accuracy I'd certainly recommend getting a scoring blade for your trimmer.

The original concept was created by Shelley Hopps.

Stamp set: Best Yet (level 1 hostess)
Ink: Old Olive
Paper: Real Red, Old Olive, Whisper White, Ski Slope DSP
Punches: Scallop oval, large oval
Other: Dimensionals, chocolate chip & old olive narrow grosgrain ribbon


14 November 2009

Simple gift boxes

These are my favourite boxes - they're so easy to create, you score an A4 piece of card stock at 7, 14, 21, 28 cm (turn card & score ONCE at 7cm - horizontal line).


Then cut on the lines at 7,14,21 & 28 to the one line that was scored horizontally, remove the small rectangle at the end and fold & decorate (always the fun bit).

[Clear embossed tree]

Stamp sets: Season of Joy, Soft Holly (wheel)
Ink: Old Olive, Real Red, Always Artichoke (wheel), Versamark
Paper: Old Olive, Real Red, Whisper White
Other: Stamp-a-ma-jig, Clear embossing powder OR Heat and Stick Powder & Dazzling Diamonds glitter, sponge dauber

[Heat and stick & glittered tree]


12 November 2009

Gift box inspired by Debbie

Debbie Airey from my team gave me a delightful box as a demo swap - the original box used Fifth Avenue Floral and Great Friends & then she kindly taught me how to make one using Snow Swirled which is such a versatile set.


Well it's been a long time since I stamped on acetate with Stazon White & I'm very happy to report that I'm a much better stamper now - it used to scare me but no sign of any hand shake & the snow flake was a dream to cut out - thanks Debbie this is such a cool project.

Stamp set: Snow Swirled
Ink: Baja Breeze, Not Quite Navy, Stazon White
Paper: Baja Breeze, Not Quite Navy, Whisper White, "Acetate"
Other: Scallop edge punch, mini glue dots, Tombow Glue, Dazzling Diamonds glitter


Debbie's original inspiration was the lovely Marelle Taylor who kindly has a tutorial explaining how to make this so simple but effective box HERE. She calls it the 7s box - I'll be back tomorrow night with another 7s box so until then...

Hate to say this but Stazon White & Stazon cleaner are in the Spring Mini which expires November 30th so don't forget to order some while you can.


10 September 2009

Great friends all right

Debbie Airey and her daughter Sarah share the blogging duties on Deb's Stamping Corner

I've always admired both of their work so it was  a very pleasant surprise to also receive on Saturday at the demo training Debbie's swap and a Good Friend card from Debbie and a Great Friend card from Sarah - now do I feel special or not!

The official swap complete with home made bath bombs. If you'd like to know how to make these Debbie is organising a ladies night next Friday night (17 September) so contact her HERE if you'd like to know more.


And as well as stamping with white Stazon on the acetate if you look closely here you can see the cellophane bag has been too.


My extra special card from Debbie:


And a very special one from Sarah:


22 August 2009

Parisian Breeze

Stampin Up Parisian BreezeThis is the name of the 2nd specialty designer series paper to be introduced to NZ (the other is Sweet Slumber in the main IB+C). The first thing you probably notice is the difference in price between it & the other designer series paper ($27.95 cf. to $19.95) - that's because it's card stock weight which makes it perfect for creating boxes (as well as embellishing cards). If you click on the picture it will enlarge it so you can fully enjoy how beautiful it is!

My team this week have been having a bit of a cyber-swap on our team demo forum and you may have seen some increased blog activity out here as well because of this - I certainly have really enjoyed it.

One of the challenges was to Try a New Technique - so I finally downloaded one of the many templates SU! provides for us demonstrators & attempted to recreate the cute wee handbag box on page 5 of the new Spring Mini. I'd also just recently purchased Dotto ( & I'm totally hooked so this may not be my last post using templates). The Dotto (which is a removable adhesive) holds the template firmly in place whilst you cut around it and then you can peel it off & use it again - how fantastic is that!


This is my wee handbag box using Parisian Breeze DSP & the Great Friend stamp set. If you'd like the template to have a go yourself contact me or your demonstrator.