31 October 2008

Pop Up Cards goes Bodacious


Well this is the 2nd card from my home class this week & lots of WOW so a big thank you to my upline Jacque for the inspiration behind this card. I couldn't find a tutorial on SCS!! So have created my own - click HERE to see it. I do hope you can all appreciate the "nearly perfect" stamped images on Whisper White which is an ultra-smooth card stock - perfect for solid stamped images!


Stamp sets: Bodacious Bouquet, Seeing Spots, It's Your Birthday, Linen background
Card Stock: Regal Rose, Certainly Celery, Chocolate Chip, Whisper White
Ink: Regal Rose, Certainly Celery, Chocolate Chip, Whisper White craft ink
Other: Word window punch, 1" circle punch, 2mm circle, linen thread, hodgepodge hardware, Celery grosgrain ribbon, dimensionals

Cutting dimensions:
Regal Rose: 5-1/2 x 8-1/4"; 1-15/16" square
Certainly Celery: 5-1/2 x 2-1/4"; 2-1/4" square, 7-7/8 x 5-1/4" (inside the card)
Chocolate Chip: 5-1/2 x 2"; 2-1/8" square; 3-1/2 x 2"
Whisper White: 1-7/8" square; 3-3/8 x 1-7/8"


29 October 2008

Denise is having a party

to celebrate her blog being 1 year old (oops so is mine) & is giving away blog candy - some of it is SU! - so check it out & wish her a Happy Blogavviversary! - maybe a new word has been created in the blogging world - maybe I'm tired & should go to bed!! Good luck all!

Click HERE to check it out.

28 October 2008

Pop Up Cards Part 1

Well the card that was supposed to be the hardest (well it looked the hardest) was the easiest and had a bit of WOW. Absolutely brilliant tutorial (per usual) on SCS which you can view HERE. It worked fine chopping a piece of A4 card stock in half i.e. 4-1/8" but all other cutting & scoring directions I followed as per the tutorial.

Season of Joy and Pop Up card
There was a bit of scoring but for one card really not too much effort. The card can be folded flat & posted in a normal envelope - how clever is that!


Stamp set: Season of Joy
Card stock: Real Red, Garden Green, Whisper White
Ink: Real Red, Garden Green and a Real Red marker pen
Other: 1-3/8" circle punch, Crop-a-dile, jumbo pewter eyelets, real red grosgrain and red gingham ribbon, mini glue dots, Sticky Strip, Corner rounder


26 October 2008

Farewell Tuihaina White


Tui & her family are off to Perth & she will be sorely missed by all us stampers. She took me under her wing at my first card class when my eyes were as big as saucers.

Jacque thought it would be cool to give her a 6x6 page layout of ourself or our favourite recipe for her to take with her on her travels. Which is a GREAT idea. So I found this cool picture of myself in the bush in New Zealand so she can definitely remember what she is leaving behind!

We'll miss you but hopefully we'll all catch up at Convention in Canberra next year; if I can afford to get there. So all the best & definitely Go Confidently in the Direction of your Dreams

Stamp set: Live Your Dream
Card stock: Wild Wasabi, Chocolate Chip, Bashful Blue, Afternoon Tea DSP
Ink: Wild Wasabi, Chocolate Chip, Chocolate Chip marker
Other: Scallop border edge punch, round tab punch

Have just found out that Tui's favourite foods are curry & pumpkin so changed my mind what making for the farewell dinner to Chicken & Baked Pumpkin - very nice, so click HERE to preview the recipe.


25 October 2008

Double Pocket Bag - Team training part 2


I showed the girls this cute double pocket bag we made/learnt at Regional training.

There is a tutorial on SCS now that I look; which also uses Season of Joy which you can view by clicking HERE.

But we just created by taking the Holiday Harmony DSP & it's matching colours & Season of Joy & my scribbles in the notebook.

These are my scribbles:
  1. take one piece of 12x12" paper
  2. fold opposing 2 ends in at approx. 2.5cm - this is where the Stampin' Up! grid paper comes into it's own, no scoring! Also good for placing stamped messages straight on your card.
  3. fold the other 2 sides in at approx. 9 cm
  4. you now have a tube which is approx. 10cm x 25 cm - fold it in half i.e. 10cm x 12.5cm - have the seam showing on the outside at this stage
  5. from the middle fold fold back approx. 1-2 cm & then do the other side - should like a W fold
  6. adhere at the top & embellish - we made our holes with the Crop-a-dile & the jumbo eyelets
This will be great for small gifts/vouchers/money for Christmas

23 October 2008

Non-traditional Christmas Card

The latest challenge from my SBS sisters is to make a Christmas card using non-traditional Christmas colours! No reds and greens!! and Kristina's current challenge is to use reds or pinks.


Ahh (light bulb switching on here!) my Christmas card I sent to my Aussie friends last year - inspired by my very talented upline Jacque Pedersen. Here it is in it's magnificent PINKNESS!

Stampin Up and Lovely As A tree
Stamp set/s: Lovely As A Tree, Itty Bitty Backgrounds, All Year Cheer I (retired)
Ink: Regal Rose, Versamark
Cardstock: Whisper white & Regal Rose
Other: White embossing powder & glitter mix, word window punch, rose grosgrain ribbon

The tree has just been stamped off 3 or 4x to create this effect.

PS I love this done in night of navy too - the "snow" looks even more spectacular then!

22 October 2008

Team training & welcome Debbie on board

Stampin Up and Tags for All
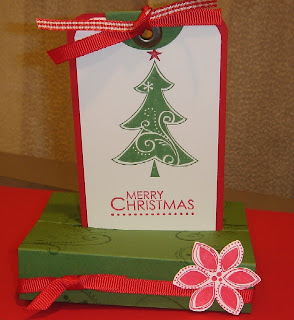
How exciting my team is growing, our latest member is Debbie Lamb from West Harbour - tonight at my training the girls got to see all the great swaps I received from the latest regional events - so many great ideas - & we cased one of the best. Rachael Knight's cute wee box - you can see all of Rachael's by clicking HERE.

My prototype got changed in training as the background card stock got Snow Flurries stamped on it using River Rock ink - which worked really well. I actually have a free night tomorrow so may post Version 2.

Stampin Up and Tags for All
Stamp set: Tags for All
Ink: Basic Grey
Card stock: Whisper White, Purely Pomegranate, River Rock & Holiday Harmony DSP
Other: Blender pens & Stampin' Pastels, Dazzling Diamonds glitter, word window punch, Purely Pomegranate DS ribbon

I just adore these snowmen they're so cute!

Update: Rachael was inspired by Andrea Hayes who has a lovely tutorial on how to make this cute box click HERE to view.


21 October 2008

Kathryn & Clare beat me to the punch


They've created a delightful spinner card using Unfrogettable - guess what I had planned for demo training tomorrow night! Haven't they done a great job colouring the frog in too. Me I'm back to the drawing board for another idea.

18 October 2008

A surprise gift for............


This is a cool wee project designed by the incredibly talented Anabel Welch. She's modified a pull treat to create a delightful gift bag for a small cook book. It's created from one piece of DSP - Stampin' Up!'s designer paper is a good quality weight & perfect for this project - it has been trimmed to 12x9". The left over scrap we have used the other side to create the belly band which is embellished how you want.

Pull on the bow & viola...................SURPRISE!


17 October 2008

More lovely trees

Stampin Up and Lovely as a Tree
Lovely As a Tree must be the most versatile stamp set we have from Christmas to Masculine to a background to stamping on a candle!

I'd just received my new ink colour Hunter Green so used that to stamp my lovely trees & I'm really happy how they turned out plus the gorgeous greeting from Seasonal Greetings - perfect & a bit of cellophane, ribbon & a wee tag to finish of the project.


Anne's asked for a link - just click on stamping on candles above - it's bolder & a different colour which means it's a hyperlink. Re what ink to use think anything goes, something that doesn't run on tissue paper, also can colour in outline stamps with markers etc. Only other hint is to cut away the excess tissue paper too. Have fun!

16 October 2008

Is this the loveliest tree you've ever seen??

Stampin Up and Lovely As a Tree
Don't ask me why it has taken me so long to open my jar of heat n' stick powder as it was so simple to use & I only hope the photo does justice to how beautiful & glimmering the tree is. I am being dazzled by all the iridescent colours that are sparkling at me.

Stamp sets: Lovely As A Tree, Seasonal Greetings
Ink: White Craft Ink, Creamy Caramel
Card stock: Kraft & Real Red or Old Olive
Other: Heat n' Stick powder, heat tool, Dazzling diamonds glitter, dimensionals, sponge

Cutting dimensions:
Kraft: cut an A4 piece in half vertically, & 2-1/2 x 4"
Old Olive or Real Red: 2-3/4 x 4-1/4"

And believe it or not this week's SBS challenge was to do a new technique - so without knowing it I've achieved Challenge 2 (& one day early!) - so I've no excuse not to finish off challenge 1 with two more crab cards.

The reject card on River Rock:
The dazzle is amazing/blinding but the white just isn't white enough!

And the Lovely in Real Red version:

Stampin Up and Lovely As a Tree and heat and stick
(Debbie stamped hers just on the red card stock mat & that looked pretty incredible or should that be INKredible!)


I've been tagged

Wow by 3 of my SBS sisters: Sharon, Vanja, & Cheribella

Here's how it works...

1. Link to your tagger and list these rules on your blog.
2. Answer the five sets of five (these are easy)
3. Tag 5 people in the last section by leaving their names as well as links to their blog.
4. Let them know they have been tagged by leaving a comment on their blog.

Here are the 5 sets of five...

Things you love...
1. fresias
2. sunshine
3. sound of waves breaking
4. my family & friends
5. STAMPING!!!!!!!!!!!!!!!!

Things you don't love...
1. Being tagged - this is harder than challenges!
2. the alarm clock at 6am especially when I've been creating or blogging to midnight (which is most nights)
3. inconsiderate people
4. not enough hours in the day
5. weeds - there are too many in my garden at the moment!

Songs on your iPod/Playlist
Must admit don't own an iPod, so my favourite bands of all times are
1. The Cure
2. U2
3. The Dudes (a kiwi group)
4. Split Enz (another kiwi group)
5. Snow Patrol

Favourite Foods/Drinks
1. wine
2. smoked salmon or fresh fish
3. sundried tomatoes
4. fresh asparagus
5. roast chicken

People you are tagging...
- see no. 1 of things I hate, so won't pass it on but thanks for asking me

15 October 2008

Maybe the last of Tart and Tangy for awhile


I love this stamp set and am kinda sad that I had my last home class with it last night, as I'm now full steam ahead for Christmas it maybe awhile before it sees ink again or in last night's case markers & Crystal Effects.

We looked at using markers to colour in stamps & this set is perfect to demonstrate this technique especially for beginners.


I made a strawberry one & smothered it with Crystal Effects - it looks good enough to eat! And I made my first red apple & Nickie had the great idea of just adding the Crystal effects to the pips - so cute!


12 October 2008

My first SBS card challenge

Well we had to make 5 cards, all with the same image and colours but change the background and embellishments! I've only said tentatively I'd do it - 5 cards! Well the weekend is over & I've chatted, lunched & gardened & just a tiny bit of stamping at night time so I've half achieved the challenge which is maybe what a tentative yes means. I've only got 3 of the 5 cards for the challenge & one was already made (a year ago)!

I started with Crab & Co as I had it out on Friday night - it's part of Stampin' Up's 20th birthday promo and therefore 20% off the price, so thought I should create some stuff with it.

This is the card I made a year ago at a class at Jacque's & I love it but it's a very sad shaker card & leaks sand but is seriously cute!

Stampin Up and Crab and Co and Shaker Card
Stamp set/s: Crab and Co, Cheesecloth background (retired)
Card stock: Real Red, Kraft, Whisper White
Ink: various - image coloured in with a blender pen
Other: acetate, oval cutting system, foam mounting tape, sand, hodgepodge, cream grosgrain ribbon

My 2nd card:
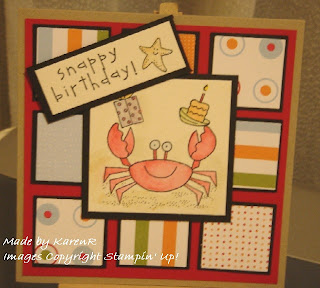
Stampin Up and Crab and CoStamp set/s: Crab and Co
Card stock: Real Red, Kraft, Basic Black, Watercolour paper, Summer Picnic DSP
Ink: Black Stazon
Other: Watercolour crayons & an aquapainter, 1-1/4" square punch & 1-3/8" square punch

This was my first attempt at using the watercolour paper & my crayons. What I learnt you need to use Stazon, Basic Black ink is not waterproof enough & runs as the image does get really wet, also don't rush putting on a 2nd colour until the first colour you're painting by has dried - my present is a bit sad :-(

My 3rd card:

Stampin Up and Crab and Co

Stamp set/s: Crab and Co
Card stock: Real Red, Basic Black, Whisper White, Summer Picnic DSP
Ink: Basic Black, Real Red, Bashful Blue, Creamy caramel, Close to Cocoa
Other: Blender pen, dimensionals, 2-way glue pen, Dazzling Diamonds glitter, Hodgepodge, red gingham ribbon, sponge

Well I have 3 more days till the challenge finishes (though it maybe 4 as my SBS sisters are mainly in America) so may be able to create at least 1 or 2 more (they're in my head) but have 2 card classes to run, plus 1 to attend plus 2 birthday cards to create this week (and my real job) so will have plenty to post if I don't make it.

Another Box in a Bag


These are so cool I made my latest effort with my favourite DSP Summer Picnic - the finished bag is so beautiful we decided it didn't need any embellishments.

Card stock: Real Red, Summer Picnic DSP
Other: Round tab punch, 1/8" hand held circle punch, slit punch, Sticky strip, olive grosgrain ribbon

Doesn't it look good enough to eat?

NOTE: Just a wee reminder this DSP is in the spring mini catalogue which expires November 30, so if you want some make sure you order it before then. It's a real bargain at $13.95 for 12 sheets of 12x12".


11 October 2008

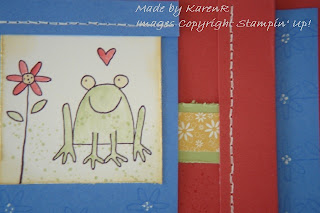
Challenge Entry - a popping frog!


Stampin Up and Unfrogettable
Well I'm trying to be efficient but also do some challenges, my new SBS sisters have started the first one but that requires 5 cards - so I'll be stamping a storm this weekend - especially as it's cold & wet!

Anyhow back to the point the incredibly talented Kristina Werner who does Make A Card Monday (& now TGIF) tutorials has a regular challenge - so this is my entry for her latest challenge plus for Trudi from NZSU blog to make a Happy Birthday card (clever eh' 2 challenges TICK).

Inspiration was taken from the Frog on top of the duvets plus I'd just had out for a new customer the cards I've made using Unfrogettable so I've changed the colours to fit with Kristina's challenge from one I already had made.


Stamp sets: Unfrogettable, Itty Bitty Backgrounds
Card stock: Ruby Red, Ballet Blue, Certainly Celery, Whisper White, So Saffron DSP (Palette o' Prints pack)
Ink: Basic Black, Ruby Red, Certainly Celery, So Saffron
Other: Mat pack, white Signo gel pen, blender pen, distresser, sponge dauber

Cutting Dimensions:
Ruby red: 10-1/2 x 4-1/8" - score at 5-1/4" and 3/4"
Ballet blue: 2-1/2 x 4" - score at 1/2" plus 9-1/4 x 3-3/4" - score at 4-1/4" plus create a mountain fold around centre fold for half the cut out frog to be attached too. I created mine by folding the card stock at the score mark then marking on top edge with a pencil at 2" & a mark on centre fold at 1-3/4". Place a ruler on the 2 marks- should look like a triangle & using my bone folder score a line. This will create a PEAK. Click HERE to see a wee tutorial.
Certainly Celery: 4 x 3/4"
So Saffron DSP: 4 x 1/2"

Front of the card I have stamped the bottom half with Ruby Red & the Itty Bitty Backgrounds splotchy stamp, this has also been stamped on the Whisper White with Certainly Celery ink - makes the froggie have spots on his tummy. Lightly sponged around the Whisper White Card stock with So Saffron.

Thanks for poppin' over!


9 October 2008

A sweet card from Clare

Stampin Up and Heartfelt Thanks
One of my downline sent me this gorgeous card by e-mail. I just love it & am going to case it but wanted to share it with you all - as it's so gorgeous. She's in love with embossing - click on the photo to enlarge it & see the gorgeous heartfelt jump off the page!

Well done Clare & keep inspiring us all.

8 October 2008

Update from the Regional training

Stampin Up and Live Your Dream
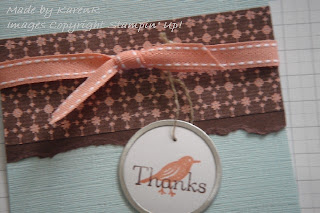
Hi all I do not know where the days go. Just a quickie from Saturday's demo training but I saw lots of great ideas which I will share when I have time. We got to play with the Live Your Dream stamp set, the I can hardly contain myself scallop edge border punch & the gorgeous Afternoon Tea DSP again - only 2 months to the launch of the Summer Mini catalogue & their official release.

This time I got to make a matchbook card - very quick & easy but rather effective.

Stampin Up and Live Your Dream
Stamp set: Live Your Dreams
Card stock: Soft sky (textured), Chocolate Chip, Afternoon Tea DSP
Ink: Groovy Guava, Chocolate Chip
Other: Metal edge tag, groovy guava DS grosgrain ribbon, Scallop edge punch, 1/16" circle punch, linen thread