Showing posts with label #SCTbigboxevent. Show all posts

25 October 2023

Reverse masking

Fall in Love was the name of my Lawn Fawn class at the recent SCT virtual cardmaking event. I blogged the official cards yesterday and you can find the blog post HERE.

When we received our big box of goodies I thought at first looking at my pre-class prep aka homework; how weird I have pink (guava) gingham paper and not orange (fake tan) as per our class handout but I wasn't concerned as I had the Fruit Salad DSP where both coloured gingham papers came from so I just substituted the pink we received for the orange from my own stash. As it turned out everyone got the pink one as Lawn Fawn didn't have enough orange DSP to kit for 3400 attendees (though they do cut 12" x 12" DSP into 4; so they didn't have 850 sheets to share with us all).

 Jenn Shurkus aka Creative Chick the teacher and designer of the classes actually rose to the challenge and provided new cutting instructions so everyone had enough orange to do the Fall cards. Then she created a few cards using the pink DSP as well to share. 

Jenn's new cards as well as being pink and teal (her 2 favourite colours) also featured Mr. and Mrs. Harvest (she had added the boy scarecrow from Happy Harvest) but I was intrigued how she also added lots of patches to the 2 scarecrow outfits. and I couldn't work out how she did it with nothing outside the stamped image. What she actually did was a reverse mask, cutting out the stamped image on the line and then adding the "mask" to protect what is going to be die-cut. It looks so cool and I'll definitely going to make a few more, today I've just added 2 patches to an already stamped image I had left over plus used up the left over bits including the pink gingham DSP plus I also pulled out last years Lawn Fawn class stamp etc. from the SCT Fall 2022 event box. 


For this play I coloured my girl scarecrow slightly different using Copic pinks (RVs) and yellow browns (E19 + YRs). I'm really rapt how it all turned out. But these are such cute images it would be hard to not make "cute" and fall in love with Lawn Fawn but I might be slightly biased! From the 2022 kit I've used the scalloped rectangle die, sunflower stamps and the scripty hello die.


Well this was my first go at reverse masking or even thinking of the concept, Jenn Shurkus sure is a Creative Chick!


✿Karen✿ 

24 October 2023

You Crow Girl

I finally completed my Lawn Fawn class from my big box event taught by Jenn Shurkus over the weekend. I think any Lawn Fawnie who wasn't enrolled with the SCT event is so jealous at the moment as we all received as part of our class kit this adorable scarecrow girl; there's good news for them it will be released but I'm guessing next Fall so they have to wait a wee bit.

Jenn designed and taught 3 fun cards for us to create and kept the colouring all the same but used the extra elements we received in our kits in different and fun ways.


We received the stamp set and matching dies, 3 scalloped border dies, a very handy farm fence die, an "Autumn Breeze" stencil - see card 2 and 3 above plus all the patterned DSP. We've ink blended through the stencil and also ink blended the edges of the layers, some fences and some scallop borders. Jenn used every item we received including the 3 different sizes of scallop borders.

I've used my own ink collection as the only Lawn Fawn inks I have bought have been the alcohol safe ones which come as a pack of 4 mini cubes. Space is a real issue in my craft room i.e. there is no more room!! My colours used Catching Rays (CP), Apricot (PFS - too light - should have gone darker), Paradise (NEW PFS ink - I think a great blue to replace LF's Rainforest, well it played along nicely with the spotted DSP). Mushroom (C9 - happy with this swap for LF's Soot which apparently is a brownish grey-black, I think this Mushroom ink is brownish grey-black too ;)

Good tip: to self and all of us when cleaning stencils with fine details, don't use a microfibre cloth as it's too sticky and I caught one of my leaf's inner working and have lifted it up quite badly; lucky it's a 6" x 6" stencil but a good reminder to work with just my plain flour sack (cotton) cloth and the alcohol spray in future.


Well I loved this class as I love Lawn Fawn and the images always bring a smile to my face. I'm off to make a strawberry pink girl now as we received instead of orange gingham a pink piece, who knew there still was/is problems with paper supplies. Thanks Jenn and Lawn Fawn.

#cropandcreatedelivered

✿Karen✿

12 October 2023

EZ with CZ Part 2

I managed to finish of the card set from my big box with Cathy Zielske and Concord and 9th, but getting so frustrated with Briar Rose ink its a real dirty dark rose pink. I walked away from SU! inks as they too are dirty (lots of grey undertones), so it saddens me here's another dirty pink ink. I also seem to make mud using it with the Lemongrass. Looking in the class album on Facebook I am not alone in my efforts with these inks.

These are the 3 cards together:


I have no idea how Cathy gets her blending so light. I tried wiping off excess ink by swiping my cube on some scrap paper. Her tip that I shared yesterday did not work with my smaller blending brushes. I decided to just persevere and finish the class off  and will revisit the card kit when I have finished the box off and try other colour combos as I really love the class kit.

FYI this is what we received for this class kit:
  • 4 ink cubes: Pebble, Juniper, Lemongrass and Briar Rose
  • Set of coordinating coloured enamels dots
  • On My Mind bundle : stamp set (really sentiments and additions to stamp on pots), 3 piece stencil and dies

Close up of the remaining 2 cards below, I love the Briar Rose card but still don't like how Briar Rose and Lemongrass inks blend to a brown i.e. "mud" when blended by me. If I'm honest I  also don't like the friend die cut in Pink Lemonade card stock and not sure why they introduced a new colour which to me doesn't really work that well with the ink colours. Maybe they didn't have enough Briar Rose (which is the base card) to provide us with more. I think in hindsight and I may still do it and add on top another die cut out friend from Briar Rose card, which I own. They also could have got us to make our card stock by ink blending a panel. I still don't like the "wonky" banner. The friend and the stamped banner sentiment are in the panel where we masked off the middle row to make some white space.


Last card and again I really hate my blending of that Briar Rose ink on the pots, it didn't lighten back like normal. I am hHappy though with the ink blending of Lemongrass ink onto Lemongrass cardstock and the Juniper ink onto Avocado (mid-green) and Juniper card stock. I love these wee dies and I do like the pun-ny sentiment.


I think the C9 class is normally one of my favourite classes in the big box and in the past I have loved how their inks blend which is why I invested in getting them ALL (plus the re-inkers) which is why I am so disappointed how this all turned out for me. I'm definitely revisiting this class and C9 have kindly provided us with other combos to try. Sharing Cathy's fun sneak peeks so you can see how fab her ink blending was as well.
✿ Karen ✿

11 October 2023

EZ with CZ (again)

One of the classes I always look forward to in my big box is the Concord and 9th class with Cathy Zielske, she makes it EZ and fun. I was excited also when I saw my kit as I didn't really have a stencil and dies like we were going to be using so that is always a big plus.

We received 4 ink cubes from C9 but I decided after 2 big boxes and receiving 12 cubes already that I loved their ink and they filled in so many gaps in my ink collection that I bought the remaining colours. So now I have 4 extras. The colours we received this year were Briar Rose, Lemongrass, Juniper and Pebble; all new in 2023. They seem to be very kind and always give colours they have not given away before too which is very generous on their behalf.

Now the first card uses C9 ink, coordinating enamel dots, On my Mind stencil and stamp set (which is really just sentiments) and in case you're wondering the banner sentiments are supposed to be slightly wonky/organic. Personally I would have preferred mine straight but C9 normally are very innovative so it might be a sign of what is coming.


I followed along with how Cathy did her ink blending and I did not like my first attempt (the darker card with mud at the top). She really loaded her brush up with ink and then tapped most of it on paper before blending and I did that but even though I was trying to be light handed it was too much ink. She then said something that I hadn't really tried before and it worked. 

BIG TIP TIME: Use a bigger blending brush and hold the head with your thumb and index finger so you have better control and can get a much lighter touch. 

This was much easier and she was right, the 2nd try was so much better. I'm still not sure about the Briar Rose and Lemongrass blend it is still slightly dirty. Briar Rose has really stained my pink blending brush and it looks brown and the Lemongrass looks really dark on my yellow brush too, so guess they will be getting washed after this class. Cards below; the LHS is my first go holding the blending brush how I used too with my hand gripping the handle and my index finger on top (plus loading the brush up which I don't normally do) and the second go is on the RHS using the ink left in the brush and me holding the brush with my thumb and index finger as if it didn't have a handle.


Lighter card all by itself, this is a really easy card to whip up and I love the rows of pot plants.


✿ Karen ✿ 

7 October 2023

Simple Sympathy Cards

Firstly happy world card making day (WMCD). I think it's the first Saturday in October and not an actual date. BUT IT IS TODAY, we just need the rest of the world to catch up to us ;)

I've been playing in the craft room but it's for an upcoming challenge so can't share yet with you all so thought I would blog about the "Simple Sympathy Class" with Libby Hickson for Hero Arts which I really loved. This was part of my #cropandcreatedelivered with SCT aka "my big box event". These are the four cards we created:


And this was our class kit of goodies (post class which is why my dot palette looks "used":


One of the things I was looking forward to in this class was that we were doing some simple watercolouring using a Daniel Smith Dot Dream palette. I've actually received a dot palette a few times before in kits but had no idea how to use it. In essence it is very small drops of Daniel Smith watercolour paint dried on a printed palette. It must be quite an effort to create them when a lot of dots and our one had a lot of dots but they are allow you to try DS watercolour paints which are incredibly EXPENSIVE $50 in NZD approximately a tube. I am very happy to say in my hands I do not need incredibly expensive watercolours. If I'm honest I could see no advantage over these than any other watercolour medium I already own. They were very bright but I don't think the expense is justified for the kind of dabbling I do with watercolouring but it was certainly fun to try them out under tuition.

We received as well as the dot palette With Sympathy stamps, dies and transfers coming in the Spring release for HA in February 2024. I loved this set and the transfers were amazing with white ones and black ones. My 2 pages of transfers has been cut up quite extensively and Libby suggested it was a good idea to use a small staple to keep the transfer sheet with the backing sheet.

The card below is just a wash of Mayan Yellow, Green Gold, Kingsman Green and Manganese Blue Hue paints from the palette. Dried and repeated. Dried again with a heat tool and then the transfer applied, it stuck so well to the watercolour paper. All the transfer images are in the stamp set but I love them and definitely going to buy more when released.


This card is multiple stamp images gold embossed onto black card stock (don't forget your embossing buddy powder tools) and then each image coloured in with the same shade. Some of the dots on the palette were iridescent or duotone so they are actually very sparkly in real life.The sentiment is also a transfer added to a white scrap.


This was the easiest card - it's all transfers. I love, love the white transfers on Kraft cardstock.


Last but not least the same image stamped and gold heat embossed and then Copic coloured up, die-cut out, popped up on foam and arranged in a wreath. The base card was supposed to be a very pale blue Hero Arts ink blended around the edge of the base card. I ended up doing a blend with Aqua Sky and Sea Glass which are light blue and light aqua inks from Concord and 9 as I felt that was a good match to the BG11 Copic used on some of the leaves.


I really loved this class and the images in the stamp set can be used on all sorts of cards. I've even used a black transfer on my recent play with faux dip dye play card.
✿ Karen ✿

2 October 2023

Merry and Bright

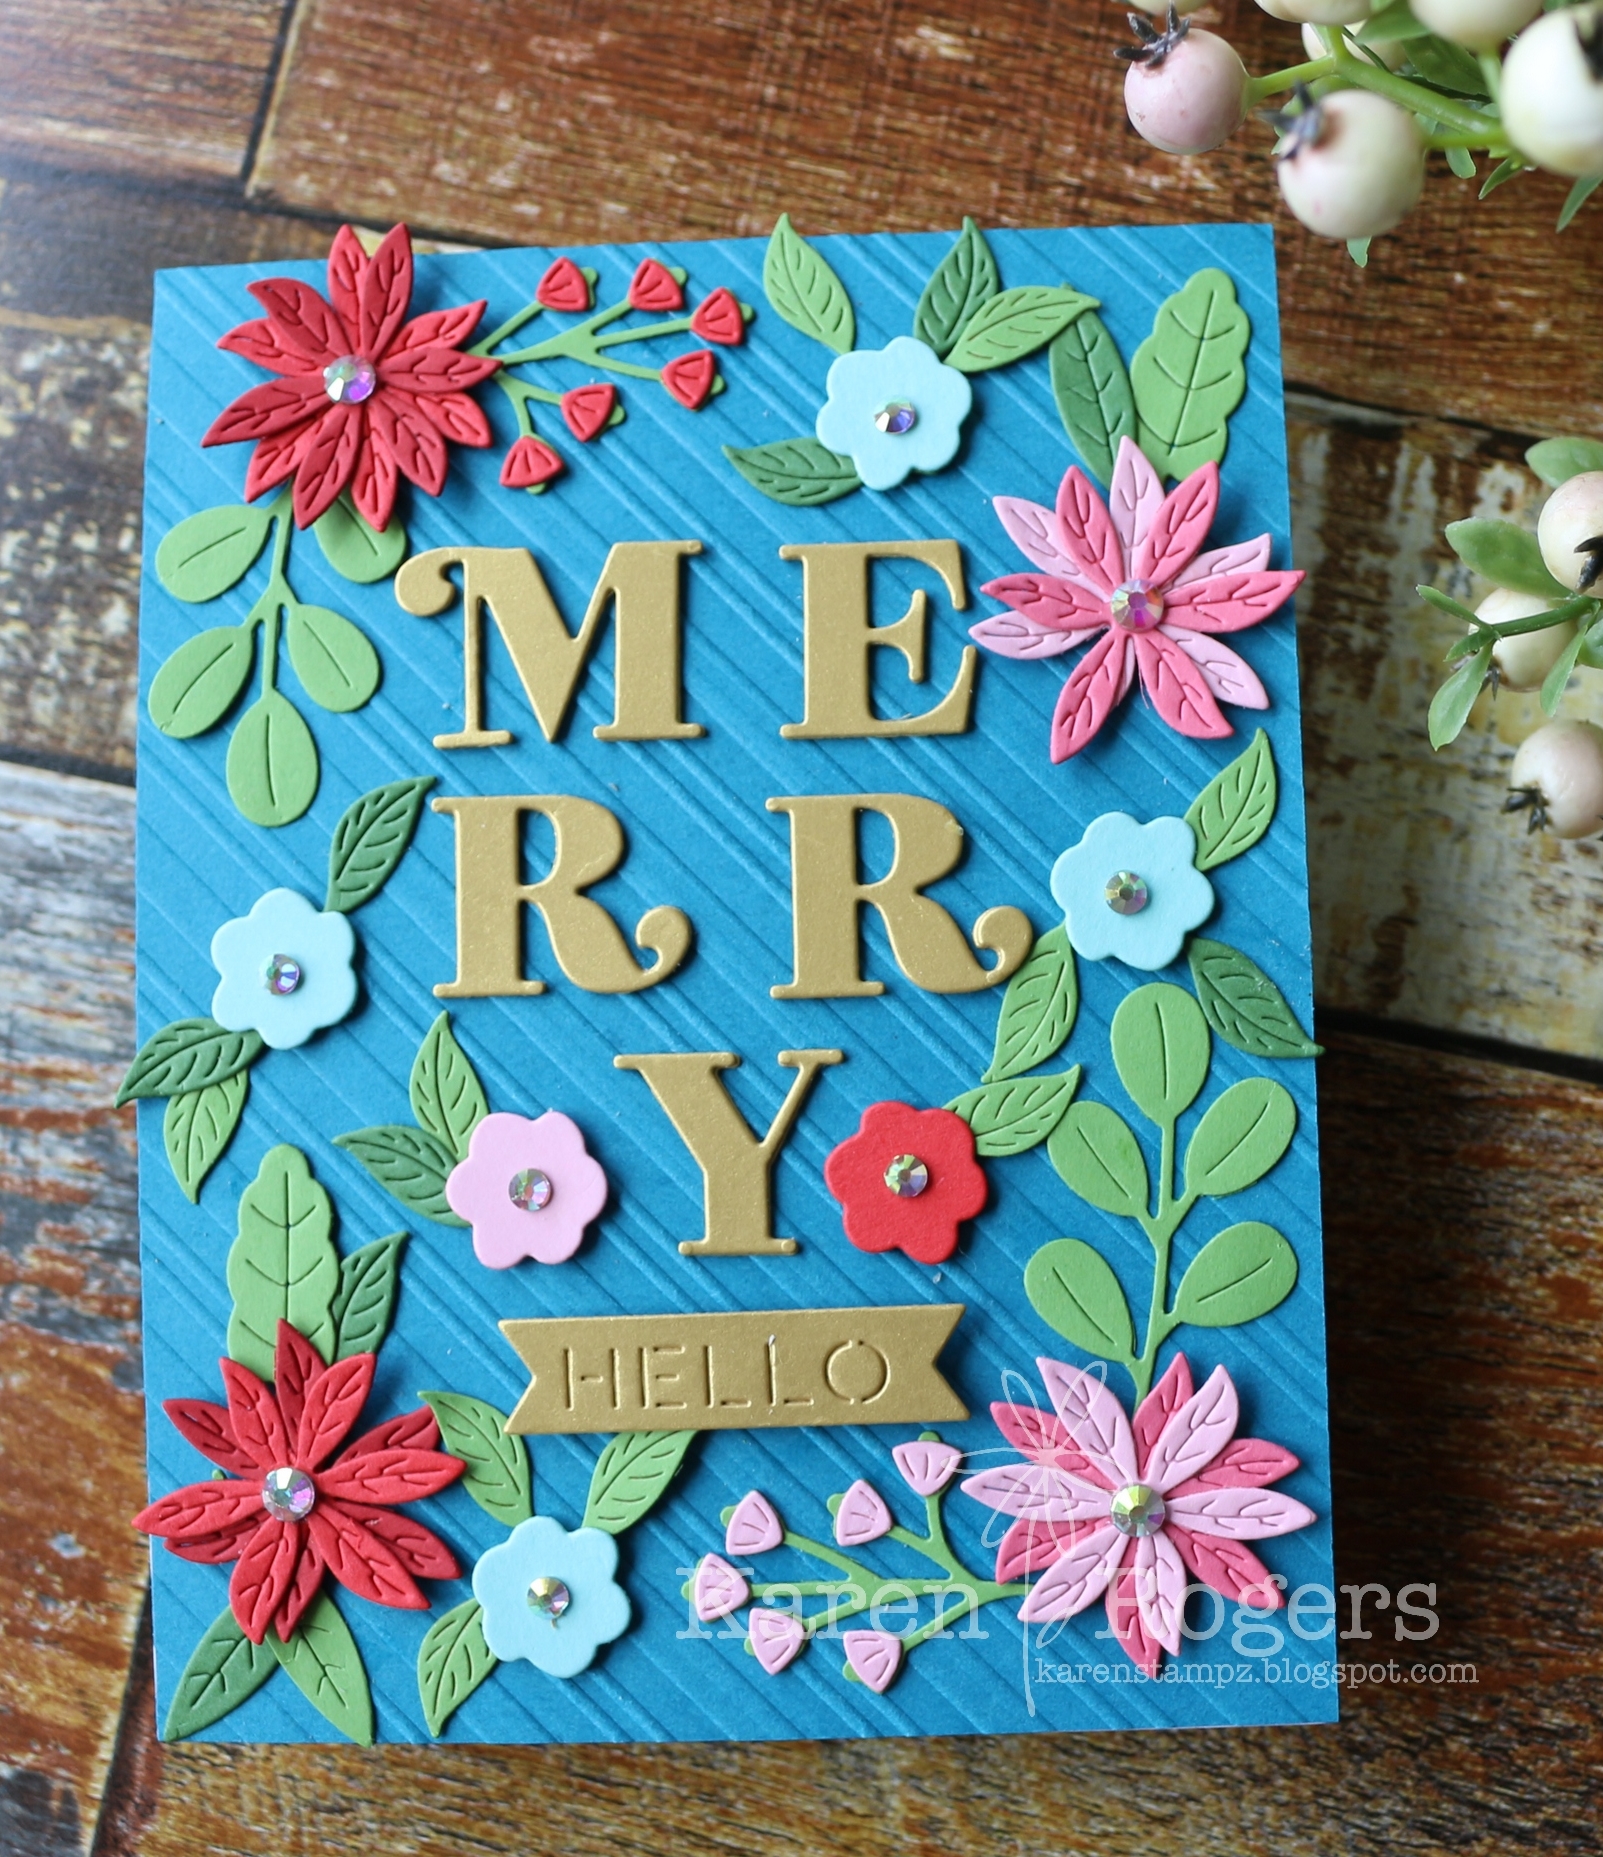
This was the name for my Spellbinders class taught by Kim Kesti for Spellbinders at my #cropandcreatedelivered event aka "the big box". I was moaning about the number of die cut pieces from last years event for their wee dancing elf  HERE but compared to  this year I didn't know how many die cuts it was possible to put on a card. I was really organised this time around plus much more confident I could do it! Here's the sneak peek before I got started of how many die-cuts I'm using in 2023....


We were very lucky we received as part of our kit swag this time this wee divided dish from SCT but as you can see I needed probably 3 of them for this class. All the cardstock was provided by Spellbinders and we received brushed gold, 2 greens, 2 pinks, 2 reds, 1 pale blue and their Snowdrift White (which I love). Also pictured in the fab stick on gems we received as well called Spectrum AB (for Aurora Borealis) and gosh do they sparkle and take on the hue of the colours around them. It didn't really take that long to die cut all the bits if I'm honest and we got to make THREE fab cards from all the bits.

The fab sneak peek above to whet our appetite and what we actually received in our kit other than cardstock: All Occasions Bow die set, Merry & Bright Tree die set, Petite Blooms & Sentiments die set and Peppermint Strips embossing folder. No stamps which was a first.


I always chop the packaging down I receive so it fits in the smallest Avery Elle storage pockets that I can get it in whilst retaining any relevant pictures and also put the dies on magnet sheets here. I love that I don't have to chop apart their dies.

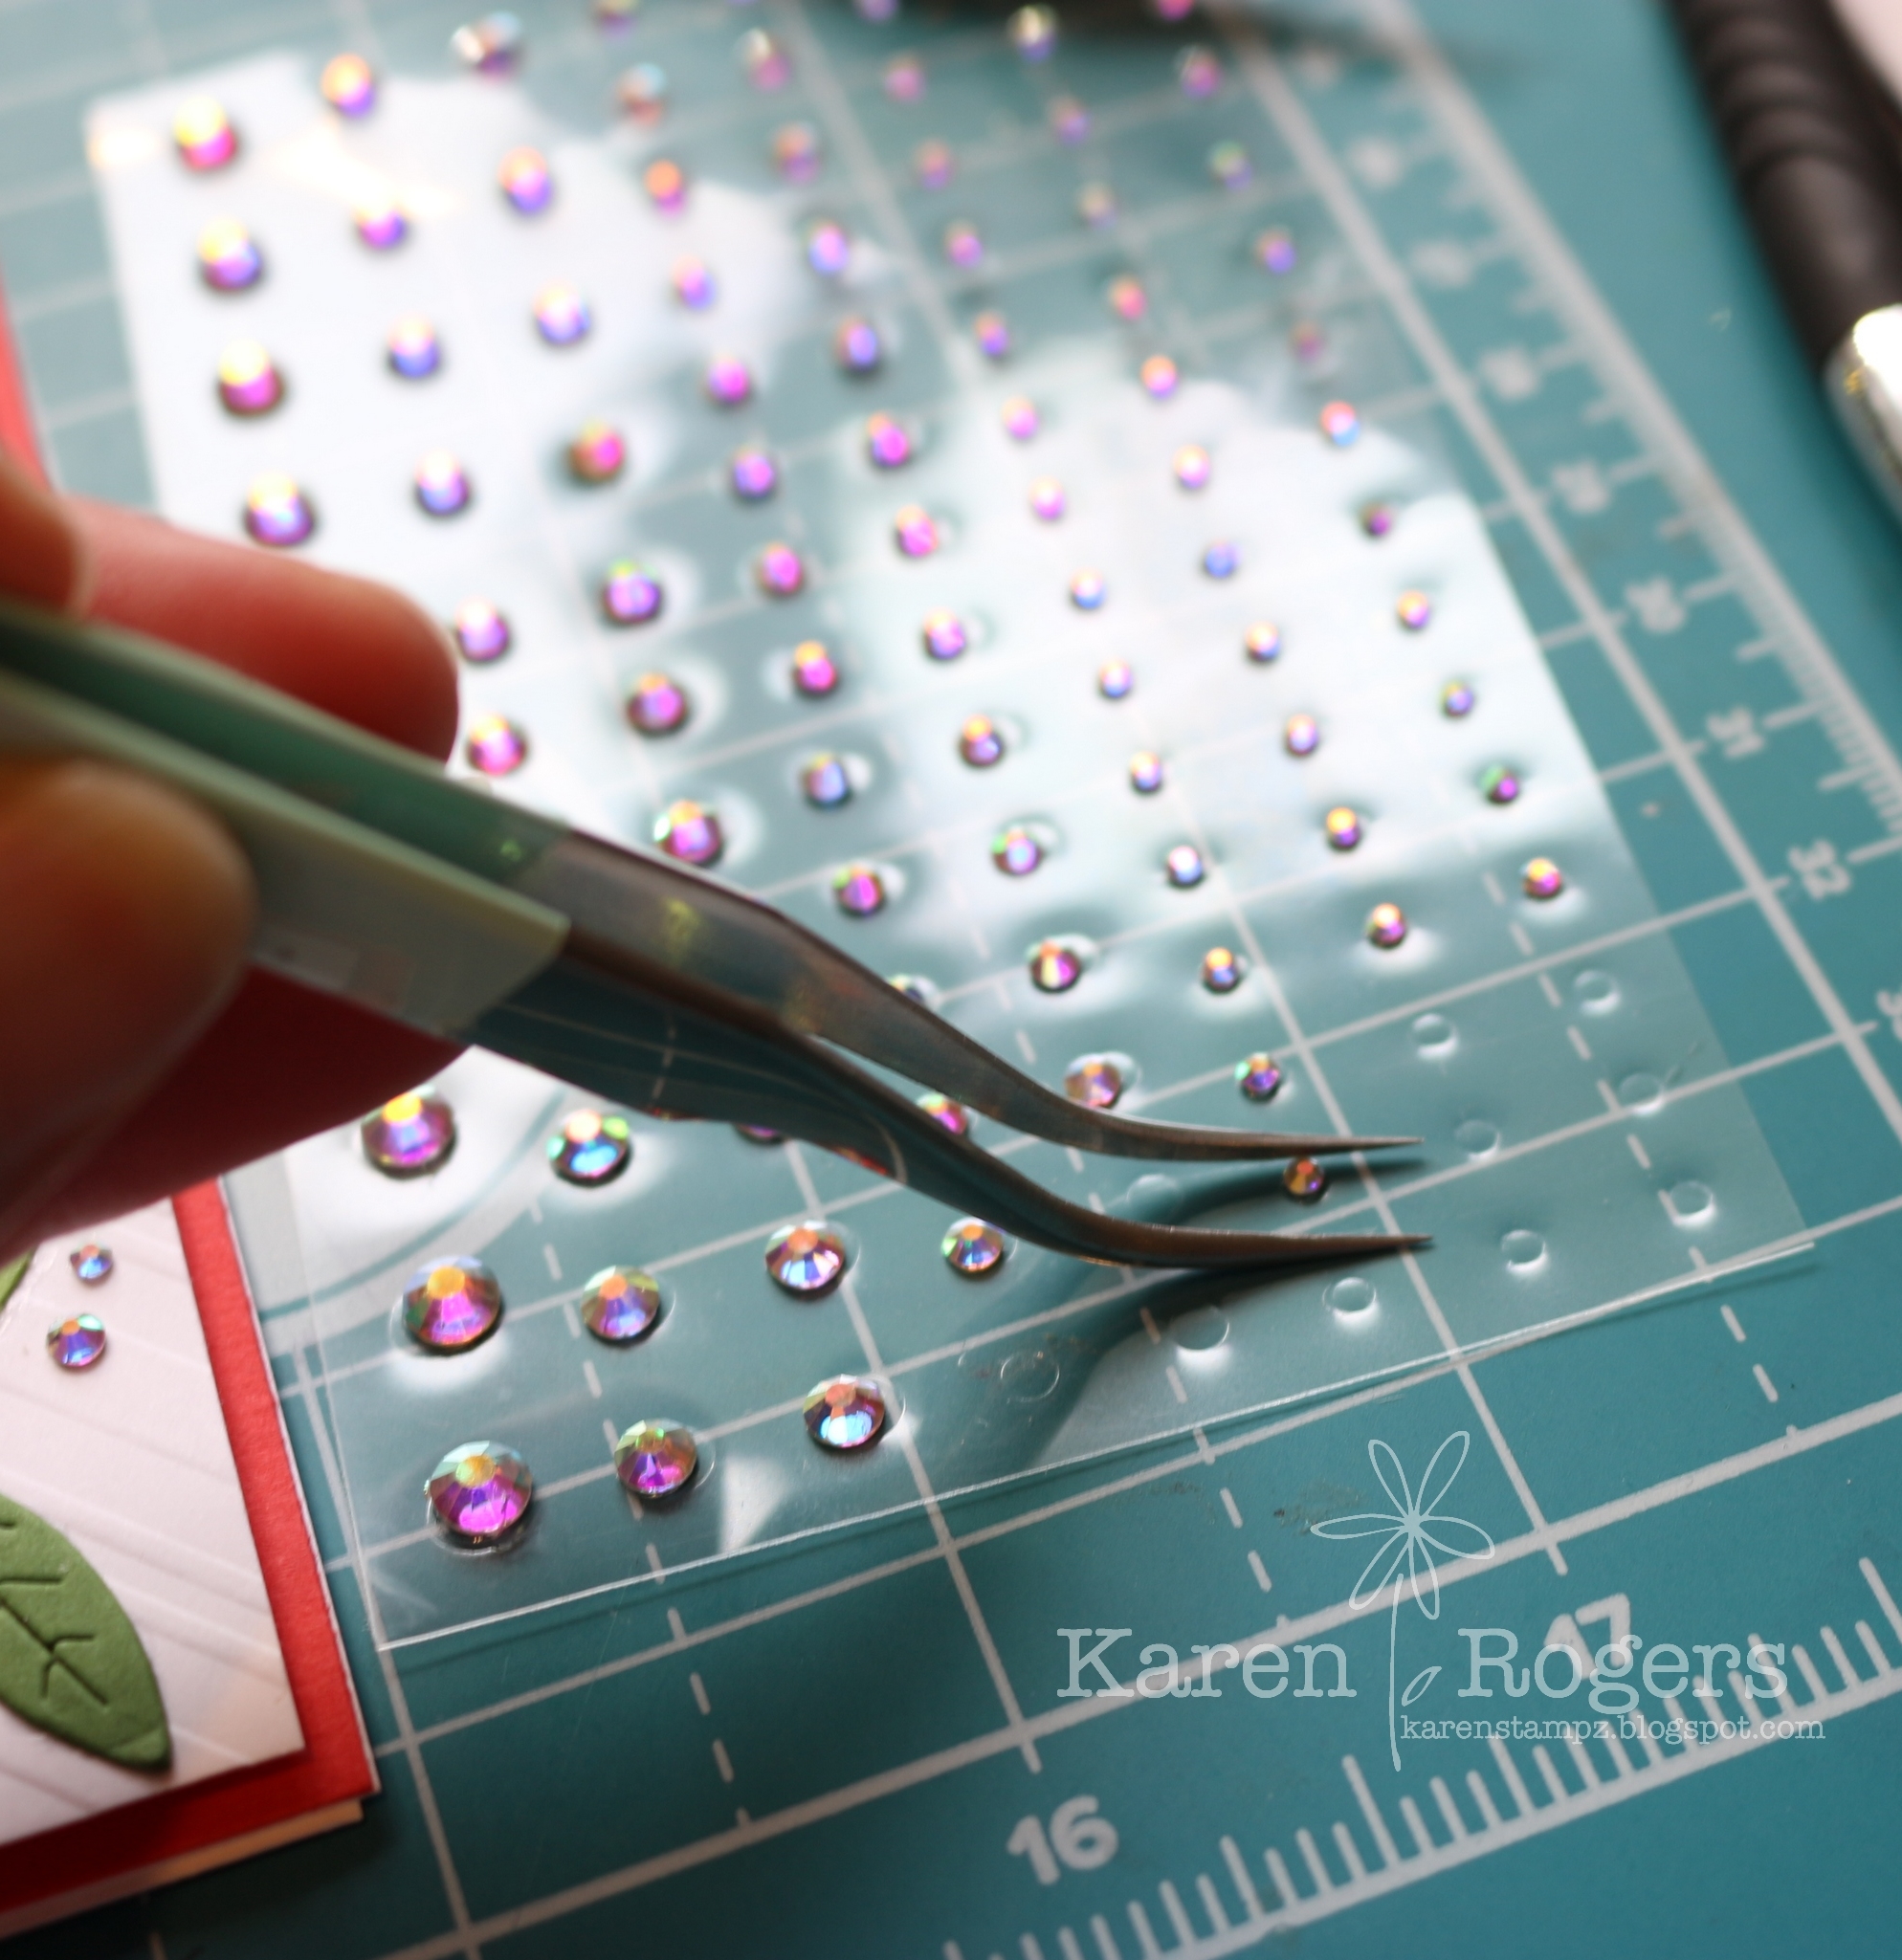
Now one of the best tricks I learnt in this class was how to get really small gem stickers of the acetate I'm sure I'm not the only person that chases them about trying to lift up with the edge of my scissors or a stabber jabber, look at how Kim did it as demonstrated by moi (and let me assure you I'm holding my tweezers in my left hand to take the photo which wasn't that easy). Now these are a pair of Sizzix tweezers with pointed ends and they don't lock but it was so easy to squeeze and lift especially if you're holding the tweezers in your dominant hand.


Now for my fab 3 cards all lined up together:


Looking at my book I thought the bow was just a really fancy gift tag and it could be but it's actually a shaped card!


And a close look up of the other "white" card:


Looking at my photo I may need to add a bit more glue under my ampersand. We also made the gold star for the card above by adding ultrafine gold glitter to an adhesive sheet stuck to a piece of white cardstock and burnishing into the adhesive sheet with your finger. Kim says making your own is more glittery than bought and I think she may be right but its messier.

And last but not least and this was the most fiddliest and I wouldn't recrate "as is" as it really used so many die-cuts but lots of examples in our albums of something similar with less die-cuts:


Now none of these have been released by Spellbinders and I've seen a Christmas release from them for 2023 already, so it maybe all exclusive but often they do release part of what we get after the event so stay tuned, I think everything is fab and worth adding to your stash. 

Well that was the sum of my day 2 creating again with only one class completed. Scrapbook and Cards Today (SCT) also made a HUGE announcement at the wrap up for this day that they're stepping back a bit and in 2024 they're doing smaller events which are one day and you receive one stamp, die set and stencil and THREE tutors make 3 cards each with the kit. The cost is a lot cheaper and seems really worthwhile and much more affordable so I've signed up for the first one in early February. They still plan to do one "big box" next year but again the Fall one in late September and I was actually thinking that I probably wouldn't do a Fall box again as I've now done two with them and if I'm honest we don't do Fall cards in NZ or snow either; so now this announcement has thrown a spanner in my thinking but I think it is the right decision so feeling a bit sad no more "big boxes" for me but re-arranging my wee crafty space to fit in 16 kits every six months is quite hard as it's pretty full.

Until I see you again thanks for popping in.
✿ Karen ✿

30 September 2023

Bright and Colourful Birthday cards with Taylor

Ohh its that crazy time of the year when all my virtual events happen, this weekend is what I call my big box event with Scrapbook and Cards Today and they call Crop and Create Delivered (Fall 2023).

My friend Sarah and I tried so hard at the Spring event 6 months ago to do it all and it was too stressful. So we thought this time we're going slow and enjoying the process and it's 6 months until the next one if we decide to do it. This event they have also given each teacher a 2-hour teaching slot to teach their 3 cards and an hour break, so a much more relaxed pace so it maybe possible to do them all. 

Unfortunately I can never do first day as it's babysitting day and now my crafting buddy Sarah is actually quite sick so I maybe going very slow.

There are at least 16 classes plus at least 3 mini classes showing new products plus the finale always with Jennifer McGuire which is card after card ideas she creates mixing up all the products we received from the sponsors / companies involved with the event. So expect me to blogging about the event for awhile.

I'm starting off with the Taylored Expressions cards taught by Taylor herself. The TE class is normally one of my highlights but I was aghast when I saw the colour palate she was teaching. I really like the TE inks and have been shouting myself the inkpads she uses each event to extend my range but this time I worked with what I had and tweaked the colours and used bright colours but not TOO BRIGHT.

We received in our kit from TE the Cake Walk 4-piece stencil, matching dies and coordinating stamp set; at the end of the 4-stage stenciling we had 4 images to work with. As 2 of the images were cake stands we had 3 images after our stenciling to make 3 different cards. She also gave everyone one of her fab embossing buddy tools, which I actually already owned and loved.


I'll share the sneak peek we were provided with which made me grimace. I did not like Cookie Monster, Blue Raspberry and Dragonfruit as a combo.

I decided I would swap the 2 blues for 2 pinks; one light and one bright but not in your face dark pink. Plus I thought we still needed a blue so I was trying to work out which blue was the right tone to go with the inks so I ended up going for Tahitian Tide (SU!). 


I'm actually happy with my cards and they're bright and cheery plus colourful too. The card below we used ink to make a base for the cake stand plus cake to sit upon. The sentiment inside the cake layers  is a one piece sentiment which has been white embossed. My cake stand is to the left as I must have had a bit of blue ink on my finger after blending the base. The gem stickers are Honey Bees Love Letter  and they matched the honeysuckle ink and cardstock I have used IMO. I have to say I don't like how this sentiment stamps the exclamation point. I also have a faulty other sentiment in this set which is sort of cut so my whole stamp set may be faulty but I 'll fill in the form once I've tested all 16 sets to get it replaced.


For the card below we have scored a piece of coloured card stock at 1/4" increments to add a bit of interest plus some Blossom glitter drops on the stand (PFS).


Some simple ink-blending and then splattered with white ink/paint. It almost looks like a sky.


The inside had an interesting fold but I added my wee strip of Pink Lemonade card stock to the wrong edge but I had added a wee circle of Pink Lemonade as I didn't have a big enough stitched circle diecut so it all worked out.


Well in the end that was a nice easy introduction to what is to follow from the "big box".
✿ Karen ✿

31 August 2023

Finishing off my Big Box from March

Gosh I can see my halo shining from here all my classes from SCT's Crop and Create Cardmaking Delivered aka my big box event are now completed from the last 2 events I signed up for, as I eagerly await the box for the "fall event" which starts 29th September for me. There are a few classes I haven't done that I do not like but after 36 classes over 2 events me not wanting to do two of them I think is pretty good going.

The last class I had to complete was Brutus Monroe with Christopher Allen himself, he's a lovely man but man he can get sidetracked and I did not enjoy his ability to write instructions or teach a card. I think it's the story you have to teach to the lowest denominator which in this case is MOI!


He was extremely generous with our kit swag we got a stamp set with matching dies and also a coordinating stencil, plus also a huge die to create easel cards - now this was supposed to make making easel cards easier, for me it did not but it was a really useful set complete with square dies, round dies and an oval die so really, really useful.

The first class taught was the easel card and I ended up having to tear it all off and die-cutting out another easel card plus I felt it was all too flimsy so I mounted my fancy card front on a black mat for stability. It actually tuned out looking pretty good for all that. We were supposed to blend our inks to make the panels for our die-cut flowers to be die cut out off but I wasn't really that happy so I just used do-si-do ink (CP) to stamp the pink detail on some Chamomile card stock (SP) and ink blended gently around the edges with the pink ink. The green "vine" is Granny Apple Green (SU!). We ink blended a yellow and teal ink for our sentiment and then pressed Versamark embossing pad all over it and I added Holographic sparkle glitter from WOW for a bit of wow as I don't own the product he was using from BM and it was not part of our kits. The pinkish flower die cuts are just the ink swiped on white card stock I added very pale aqua sequins as felt like they needed something extra.


Now card two was really easy the coordinating stencil to match the stamp set made a background so easily, there were 4 layers; one for each colour. I used Pinkfresh Studio inks this time; Sunshine, Clementine, Bubblegum and Aquamarine.


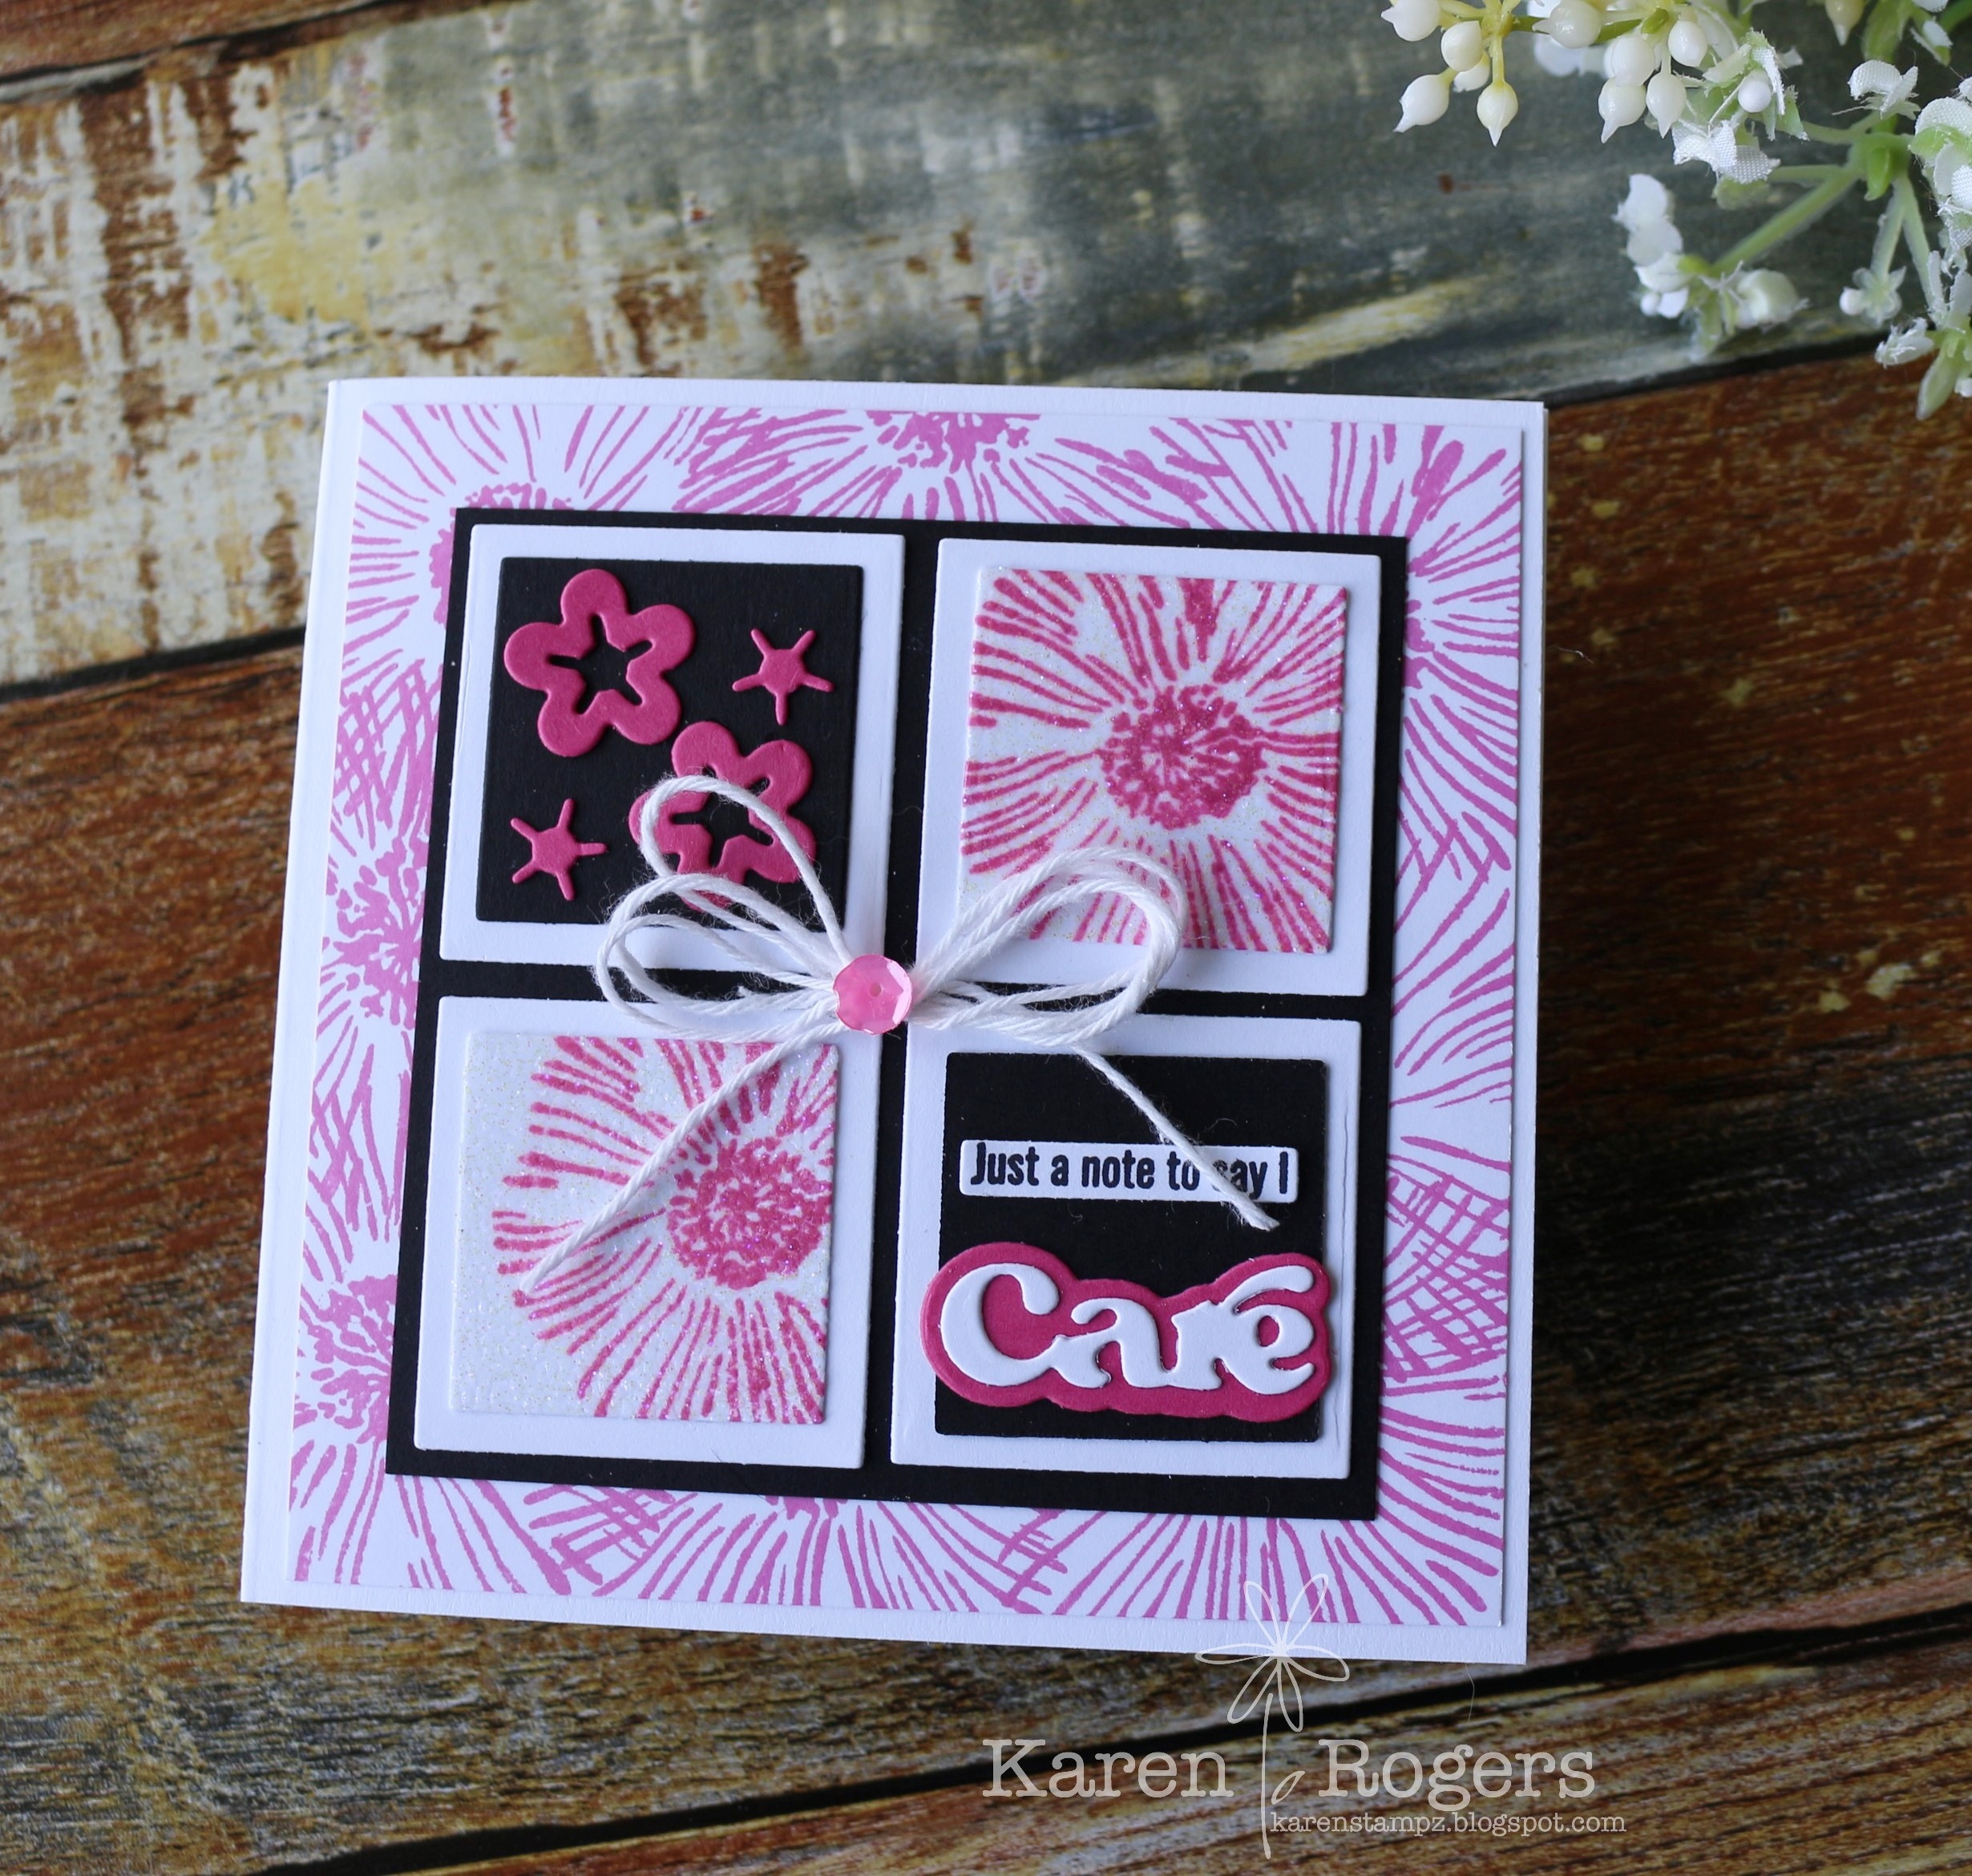
Last but not least is a very clever square card (4-1/4") the first mat which is a 4" square. I have stamped the largest flower all around the edge with Sweet Pea ink (C9). Then a 3-3/4" square mat of black plus 4 large squares of white and either stamped flower images (using the 2nd flower) or die cuts. The die cuts all came from the Easy Easel die. Again I have embossed the whole square with Versamark and added Holographic Sparkle glitter (WOW). Looking at the sneak it looks like I was supposed to do the same to the 2 small black squares.


This is actually quite a clever monochromatic card design, so in the end I'm pretty happy with the class.

So as I head into September tomorrow there's exactly 29 days till one of the biggest cardmaking party starts with 3400 crazy stampers from all around the world and the kiwis boxes have just been sent out today. There's 12lbs of "happiness" in each box. If you want to know more about these events which occur six-monthly do check out SCT HERE.


✿ Karen ✿