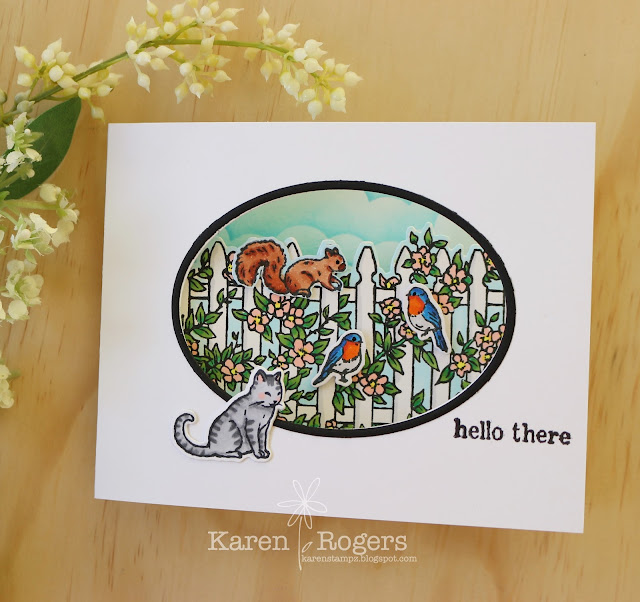
This is what Card one looks like but in reality the front panel is just the fence, so the card opens upto reveal this:
The second card is similar but we used the oval dies we received in our Brutus Monroe class kit and the fence inside the card is popped up:
This is the card I used my own mini cloud stencil from MFT for and even though the grass side of the stencil wasn't long enough either it was easy enough to continue on with blending more grass. Libby said she learnt this fold/pop-up element from Jennifer McGuire, in essence we scored a 4-1/2" x 3" piece of white card stock on the longest edge at 1", 1-3/4", 2-3/4" and 3-1/2". Then we cut the piece in half on the shortest side at 1-1/2" to give us 2 scored pieces of 4-1/2" x 1-1/2". The box that is formed the longest side is attached to the card.
The last card was also a cool technique we made paneling using matching pieces of 1/2" card stock. We were given a half piece of an A2 Mist cardstock but I cut my pieces as if I was making a portrait card not landscape. It didn't look right with the oval cut out from card 2 so I just used my Balmy Blue (SU!) cardstock that I own.
The last card was also a cool technique we made paneling using matching pieces of 1/2" card stock. We were given a half piece of an A2 Mist cardstock but I cut my pieces as if I was making a portrait card not landscape. It didn't look right with the oval cut out from card 2 so I just used my Balmy Blue (SU!) cardstock that I own.
This is what we received in our class kit. The stamp set has matching dies for everything apart from the words.
I only own one Hero Art inkpad, their granite so I used a combination of my Pinkfresh Studio inks (Fresh Pear or Meadow, Grassy Knoll and Summer Shower) and Catherine Pooler inks (Apricot and Chiffon) for my blending and I've coloured in my images with my Copics.
The only thing Libby asked us to do before we started working with the stencil was to work out how the sun mask fitted in, she suggested using washi tape (I used one of my purple tapes) to mark a ray and where it fitted in for our class. As rubbing alcohol is the method of cleaning stencils nowadays it wasn't a long term fix, suggestions from the group was to use nail polish which made me think of my White Posca pen which seems pretty permanent IMO.
Last but not least Libby's sneak peeks for us pre-class.
#cropandcreatedelivered #SCTbigboxevent
✿ Karen ✿


No comments:
Post a Comment
Thank you, I appreciate that you have taken the time to visit my blog and to leave a comment, I really do enjoy reading them.
In line with new Data Protection legislation (GDPR) by commenting you do so in the knowledge that your name & comment are visible to all who visit this blog and thereby consent to the use of that personal information for that specific purpose.
Karen