31 July 2024

Bold Bouquet Revisit

AAA Colourful have a really vibrant colour board this month which is stunning and I've revisited a class from Altenew which was part of SCT's March 23 event to play along with them. 

At the time of the class the die for cutting part of the embossed image hadn't been released but when I heard they had released it, I think myself and the 3000 other attendees went hallelujah as it sold out real fast! For this class we added ink to the embossing folder and we were using coloured card stock. In class I used red onto pink card stock. This time I took a strong red ink onto a strong orange card stock and let the magic happen.


I also think adding the die-cut flower back is a real pop and makes the card shine. My first go I just ink blended my die-cut with a small blending brush and it was pretty but I felt it wasn't quite right, so reread the class instructions and the light cream ink was swiped over the raised areas of the flower and then the die-cut flower placed back in and the ink looks like its flowed out and definitely is smoother. 

I ended up mounting the panel on some natural white as I had a card base made in my stash and I liked that it wasn't a stark white. I think the rest is pretty obvious, this technique works for all sorts of embossing folders. I'm really happy how the red and orange worked together for this technique. If you'd like to see the original card that I created in class you can click HERE to see them.

I'm also going to enter into Simon Says Stamp Wednesday challenge as this weeks challenge is beautiful flowers with Altenew, plus AAA Birthday is looking for Fabulous Flowers this month too.

Supply List:
Stamps: Easy Expressions: Birthday (The Ton Stamps) - sentiment and in my case of ready made sentiments
Ink: Berrylicious (PFS), Buttercream (ALT)
Paper: Pumpkin Pie (SU!), Neenah Natural White and Solar White
Other: Bold Bouquet EF and Flower die (ALT), Aura Opalescent sequins (SP)
Challenge: AAAC#6, SSSW challenge, AAAB#63


There's still 2 weeks to play along with the fab colourboard at AAA Colourful and it is rather cool with the reds, yellows and oranges. These colours pushed me a wee bit outside my comfort zone but I do love how vibrant my card is and the bonus is I have an "adult" birthday card to give away.

Thanks for popping in.
✿Karen✿

26 July 2024

Just Add A Sketch

We have a fun sketch to play along with at the latest challenge at Just Add InkI dislike sketch challenges personally but push myself to do them as I've found in the past I've actually made some of my fav cards in sketch challenges. 


For this week's sketch I actually had so many ideas but thought I would do something a little bit out of the box and use a stencil to make my rectangles or in my case brushstrokes ;)

I'll also play along with Just Us Girls as they have a stencil challenge happening too.

I've used 4 pink Distress Oxide inks in the stencil starting off with the lightest.

I used warm grays on the mouse and toner greys on the paint brush.

Then all I needed was to add the wee "Picasso" of a mouse from the Love Art stamp set and a cute saying and viola done. I also added 3 other diecuts behind the mouse to give him/her some dimension.

Supply List:
Stamps: Love Art (CCC)
Inks: Spun Sugar, Saltwater Taffy, Kitsch Flamingo, Picked Raspberry, Versafine Clair Nocturne, Jet Black (LF)
Paper: Neenah Solar White, Dragonfruit (C9)
Other: Brush Stroke stencil (SSS), Master Layouts 2 (GKD), Copics, white Gelli Roll no. 8 pen, blending brush (TE)
Challenges: JAI #712, JUG#737

Well I can't wait to see what everyone creates with this fabulous sketch so hope you can join in with the fun. Thanks for popping in.
✿Karen✿

21 July 2024

AAA Card Challenge 270: Sketch Challenge

It's time for another fun sketch challenge at AAA Cards and this week we have in my mind, a really easy sketch to play along with. I had so many ideas what to do, it was hard to choose which one. Laughing as now the sketch has gone live I can see it's supposed to be an Ombre sketch, phew it's lucky I added some gradient by looking at the sketch! 


In the end I went for let's make another Christmas card as eek it's only 5 months away now. I decided I'd use my favourite "colour" for the blend and work with greens (Cracked Pistachio and a hint of Evergreen Bough as it is Christmas time).


To create my card I masked of my A2 card top and bottom with some Masking Magic (GKD)  and then white embossed the lovely dove from Holiday Silhouettes (GKD), ink blended on the 2 inks, cleaned of the dove. I spritzed lightly with White Iridescent Shimmer Spray (HA). Removed the mask and stamped the sentiment from the same set in the Evergreen Bough distress oxide ink. How easy was this and I can obviously do in different colour blends.


Well I hope you can play along with us as this truly is the easiest sketch to work with and please do check out what the rest of the fab DT have created at AAA Cards with the same sketch.

Thanks for popping in.
✿Karen✿

Love Art - YES I DO!

Love Art is the name of a really cute stamp set from Colorado Craft Company that I received in my Creative Art Retreat with Jenn Shurkus recently. I love how we have made our own hearts by hand drawing with a wet paint brush and filling in colour with Distress Watercolor pencils, drying, and adding 2 more inner layers. Then everything splattered with matching Distress Paint. The images have been coloured in with Copics. I also added paint to the paintbrush tip the mouse is holding. Prisma glitter has been added to the outer edge of the hearts. I was lucky and found the matching die in a craft store in Australia as this is one set that you definitely need the coordinating die.

I did two versions, one with Saltwater Taffy and the other with Salvaged Patina.


This set has some really lovely "arty" sentiments but I felt that this one made the card quite versatile to use for any occasion. This was a really fun card and I'll definitely play with the techniques I learnt here again.

✿Karen✿

19 July 2024

Who's ready to play Tic Tac Toe??

If you've ever been scared about entering a challenge I personally think Tic Tac Toe Challenges are a great starting point as you get to choose a line and when you have 3 parameters to work with it makes it really easy to get the creative juices flowing. This week's fab board was chosen by Betty and its got some lovely choices, my only dilemma as I had lots of ideas looking at it, was which one to do!

In the end I chose the first column: foliage, layers and butterfly and working with the Fluttering Butterflies set from Pinkfresh Studio which I've blogged a few other cards using this set HERE and HERE.


I received this set and a lot of the products I'm using today from a Virtual Create and Connect event but the products are widely available now. I'm also going to play along with Inkspirational Challenges as they have a challenge to use products from 2 companies; now this is a great challenge and most of my cards have more than one product on my card. I've used mostly Pinkfresh Studio here but have the fantastic sentiment from The Ton Stamps.


And I'll also play along with both Simon Says Stamp challenges, Wednesday's would like some sparkle and Monday's would like some layers.


I've backed up all die cuts with at least one layer to help stabilize them and the frame has 3 extra layers behind it.

This is a 5 layer stencil set and these are the colours of PFS inks I used:
  • Stencil 1: Lemon Whip, Marigold
  • Stencil 2: Sunkissed, Mango Sorbet
  • Stencil 3: Marigold
  • Stencil 4: Waterfall, Turquoise
  • Stencil 5: Waterfall, Turquoise, Fruit Punch

Other Supplies used (all PFS unless stated otherwise):
Stamps: Fluttering Butterflies, Easy Expressions Birthday (The Ton)
Ink: as above, Acorn (Versafine), Versamark
Other: Gilded EP (BM), Octagons coverplate die, Notched corner frame die, Rose gold glitter card, Gems: Clear with gold dust, 2mm foam squares (SP) 
Challenge: TTTC#252, Inkspirational #320, SSSM, SSSW

Thanks for fluttering by and hope you can find time to join in with us at TTTC, its easy just choose a line and create. As always you have 2 weeks to submit a card and if you are chosen as the winner you are invited to be the Guest Designer on a future challenge.
✿Karen✿

17 July 2024

Multi Colour Letterpress with Lea Lawson

Pinkfresh Studio recently held a virtual hot foil and letter press event. We received in our kit box 5  different sets plus a Blanket Stitched Bracket die, ephemera sentiment pack and gold pearls. This Virtual event was a lower price point than their normal bigger events and it was supposed to be a "smaller event" all over in one day. Even so we still got four 90-minute classes online plus we were also provided with instructions for 2 extra make 'n takes.

I actually only bought a second-hand Spellbinders Better Press system as Pinkfresh were going this route. I still don't get what the fuss is all about with this system, it doesn't make me happy, I guess it's not really for me. Also no offence to Lea as this was the only class I could attend live, if I'm honest I don't like this set it's really old fashioned IMO.

But we'll look at the positives first; you can use the big ink pads to do multi-colours on the press plate but it would be so much easier and probably more effective with small ink cubes. As always use a small blending brush to soften/blend where the colours meet. It was also my first time using press plates that had a stencil which you attached to the magnetic platform as many parts to the set. The other thing PFS have discovered is that the press plates hot foil beautifully (probably nicer than original-style plates) so I see it as a win that if you choose to buy the added extra plate for foiling you can also use it for letter press.

Below is the Splendid Florals press plates, wee matching cutting die, stencils if you wanted to colour up a foiled image, plus the stencil which you attach with removable tape to magnetic platform and then the plates go on top. I was happy doing it this way, for some the sandwich was too tight having the extra so you could remove one shim from under the magnetic platform or use the stencil printed on photocopy paper, they provided us with the PDF file so we could print if we needed too.


These are the 2 cards we made with Lea in class, the one on the left is the letter press and the one on the right has been foiled and coloured in with ink and a stencil. All the sentiments came from an ephemera pack which was provided.

I have managed to get some graduation of colours but it is hard with the bigger inkpads and if this was your jam I would buy a set of small ink cubes for the technique. It's pretty enough  but I just don't like this image.

Trying to show the impression, I made the mistake of using an A2 die to cut out my panel and it flattened the "press" into the paper. To do this technique you have to use a thick cotton paper or watercolour paper and it's rather expensive. I now own a huge pack as we needed 5x7" panels to do the class so have plenty to play with. I wasn't the only person that commented on this happening and it seems like one solution is to repress the dry plates again.

I prefer the card below I like the colour combo better for starter and its quite a sweet shaker card, we also received in our stash a border die  with the blanket stitching which is quite nice. I have just ink blended Cherry Blossom ink to colour the panel. I was a bit heavier than Lea's card but I like it as is.


You can see the foiling here best IMO but it is very pretty in real life.

Our sneak peek for class showing Lea's card which probably shows the foiling of best.

I have 3 more classes to go for this Virtual event but if I'm honest I really only like one press plate we received, I think the other 3 sets are old-fashioned. This is the first time I have done a virtual class where I have disliked so much of what I received. We got a ton of stuff so great value for money so I will just write of the sets I dislike as part of learning to use these 2 systems better.

Thanks for popping in.
✿Karen✿

12 July 2024

Just Add Ink 710: Just Add Party Fun

This week at Just Add Ink we would like you to add some party fun to a card, so many possibilities for this challenge what a fun challenge. As soon as I saw it I knew what I wanted to create, a PARTY HAT card, as you can't have a party without a silly hat! 


I've chosen to work with some of my favourite card stock colours: Mermaid (LF), Mango Melody (SU!) and Parakeet Parrot (SU!). This is a really easy card to create and I have left over supplies to make more party hat cards.


Supply List:
Stamps: Make a Wish (P&M)
Ink: Summertime (Versafine)
Paper: Mermaid (LF), Mango Melody (SU!), Parakeet Parrot (SU!), white
Dies: Party Hat (P&M)
Other: Puff Dotty EF (SP), 2mm foam squares (SP), glitter enamel dots (SU!)
Challenges: JAI#710


✿Karen✿

7 July 2024

AAA Card Challenge 269: and I've gone to the beach ;)

It's time for another CAS challenge at AAA Cards; this week anything goes but the optional twist is Summer/Summer colours. Living in New Zealand; Summer is normally all about the beach or BBQs.

I'm also going to play along with Addicted to CAS Summer challenge too and CAS on Friday's watercolouring challenge.


I've gone with the beach as my theme, I've stamped Tyler (POD) on some Ranger watercolour paper on the smooth side with my Versafine Clair Nocturne ink. I've then coloured up the cutie teddy playing in the sand with my Zig Real Colour brush markers and a no. 4 round paintbrush which was barely wet. It was easy and fun to colour up. I did a very faint wash of light aqua but it's very faint now it's dried.

I've stamped a sentiment from Let's Chill (EE) in Versafine Clair Acorn ink and clear embossed it. Then used my Wonky Stitched Rectangles dies (MFT) as I felt they went with the beach vibe and viola all done. Now how easy was that and even if I say so myself how cute ;)

Well I hope you find time to play along too and definitely check out all the inspiration from the Design Team at AAA.


Also if you go with Summer you too can join in the fun over at Addicted to CAS too.


Or play along with watercolouring at CAS on Friday.
Thanks for popping in.

EDITED 24/7/24: I was chosen in the top 3 at Addicted to CAS


✿Karen✿

4 July 2024

More Distress Watercolor Pencils with Jenn

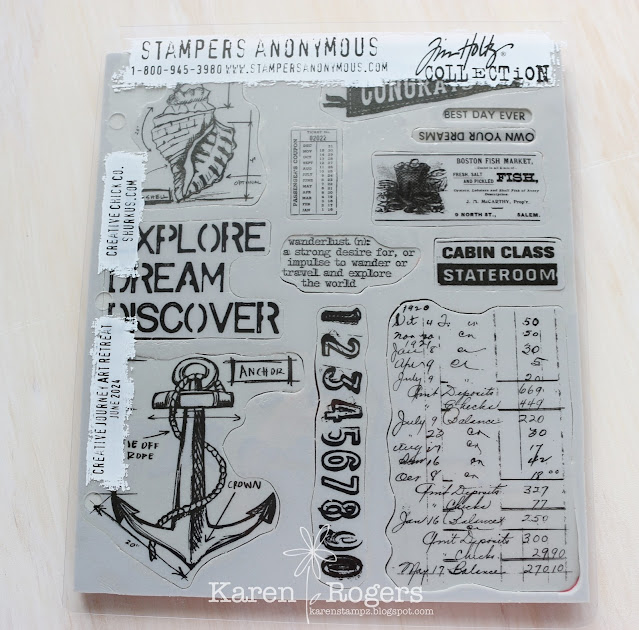
My Virtual Art Retreat Journey with Jenn Shurkus slowly gets blogged, about the same rate as me creating the cards. Again we have used Distress watercolor pencils to make our background plus the exclusive stencil Jenn designed and collaborated with Stuff by Belle to make for the event registrants. Ranger as well as being very kind and providing us with a jar of Slippery When Wet Lunar Paste also provided us with an exclusive Stampers Anonymous stamp set Jenn curated and resized from various SA/Tim Holtz sets.

This is the set we received this year, plus I have blogged TWO other cards using this set HERE and HERE.


For the first card we have used the pencils Salvaged Patina, Peacock Feathers and Uncharted Mariner for our Ombre effect background behind the stenciling/waves. We have used our fingers to dab small amounts of Distress paints directly to the stamps (Salvaged Patina, Uncharted Mariner, Saltwater Taffy and Walnut Stain) to make our own ephemera. We have used Distress Watercolor paper for all creating which Jenn provides in our kits.


We have used Distress Rock Candy glitter plus some white splatters to finish off. I actually cleaned of my stenciling with a slightly damp baby wipe, Jenn preferred to leave as is but I thought it was a shame to hide it.


The last card using this set is not at all nautical and uses the pendant stamp in the set and we have coloured directly to the stamp in a "rainbow" and then we created a stand alone Hickory Smoke Distress Oxide image which we have fussy cut out. I really like the grey on top of the watery rainbow pendants. 


Unbelievably no glitter just a few glitter drop gems from Pinkfresh Studio to finish off! The base card has had Distress inks in corresponding colours lightly blended around the edge too.


Well I have officially finished 3/4 of my kit box (approx. 9 hours down - 3 more to go) and I haven't used a Copic marker as yet and yes I still have more backgrounds that I have created with the Distress Watercolor pencils but finally my tins were able to be put away at this stage.

I have shared 5 of the 13 cards total in this kit so there's still 8 more to go and as you may know by now I love cute and there is lots of cute to come. Can't wait to share with you all another day ......

Thanks for popping in.
✿Karen✿

3 July 2024

Inspired by Tracy's snippet 74

For the latest challenge at AAA Colourful, their colour board has blue clouds with a tiny red heart balloon floating in it. Now quite a few of the DT and the entrants have already done the blue clouds plus red heart and I to be honest was thinking about an under the ocean themed card with a wee mermaid with a red tail; until I saw Tracy Evan's latest snippet HERE and I went wow this is perfect; I'll have a go with what in my stash.

I thought the colours of Distress Oxide she used were bang on and I have to be honest I haven't used Salty Ocean for ever but I thought it was the "right shade" of blue. So thanks Tracy and sorry mine doesn't look as good as yours but I'm loving the red and blue duo (and of course white) and I have to laugh Simon Says Stamps Monday challenge this week is Add Some Red/White and/or Blue and they are featuring AAAL and Create, the latter is not required to enter just the colours but all my stamps bar one are AAAL and Create stamps from when Tracy was one of their designers. She has now gone on to launch her own line of stamps.


Unlike Tracy I have just applied my ink using a rounded dome applicator and then spritzed with water I added some small text as it was too clean IMO. The stamped images have been fussy cut out.


Supply List:
Stamps: Periwinkle #987 (AALL), Art Notes #906 (AALL), Scripted Thoughts #595 (AALL), Containers #401 (AALL), Small Sentiment Bloom (WF)
Ink: Salty Ocean distress oxide (RNG), Candied Apple distress oxide (RNG), Morning Mist (Versafine), Versamark
Dies: Wonky Stitched Rectangle (MFT)
Other: Alabaster EP (BM), white splatter paint (SP), foam squares (SP), clear quartz solid sequin (GKD)
ChallengesAAAC#5, SSSM


EDITED 1/8/24: Happy to report my card made the top 4 at AAA Colourful.


1 July 2024

Beachcomber Class

I had a really enjoyable Saturday doing Jenn Shurkus' Beachcomber class with my friend Sarah who also loves all things Lawn Fawn. It was a really cool class as we used one tin (yes only one tin) of Distress Watercolor Pencils to do our backgrounds and all our colouring. 

We both made the error of stamping all the images first time around with Memento ink as we're so used to Copic colouring with Jenn. I was very fortunate that I hadn't actually die cut my images out or finished stamping when I realised. So I started again using a waterproof ink (Versafine Clair Nocturne). Jenn always uses Lawn Fawn's Jet Black ink which is both alcohol friendly and waterproof. I don't like how it stains your stamps, so I'm sticking to Memento ink for Copic colouring and Versafine for watercolouring and embossing.

All images have been stamped on the SMOOTH side of Ranger Distress Watercolor paper and all the backgrounds have been created on the same cardstock too.

We used tin three of the pencils and 11/12 pencils were used, only unloved one was Rustic Wilderness. This class is still available to purchase as it's a virtual class with videos and PDF booklet to download. The link above will tell you the supply list I had to be creative for card one as I didn't own Bayou Backdrop die and used a frame die plus some tropical vine border dies plus some seaweed diecuts (MFT's Under the Sea). For card two I replaced the radiating sun background with my Mermaid's Melody Cove coverplate from Alex Syberia.


It was quite hard inserting all the shells etc. behind the "seaweed" and I can see I have Distress rock candy glitter sticking to places where glue has obviously leaked whilst squeezing everything in.


Well another fab class with Jenn, her classes always make me so happy as they involve backgrounds and colouring!
✿Karen✿