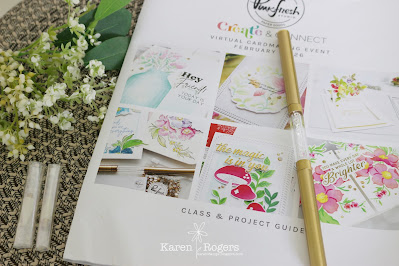
Yesterday I decided it was time to get started on my Pinkfresh Studios Create and Connect event from way back in February. I love PFS and they and my SCT Cardmaking big box are the only TWO virtual events I sign up for, they both are biannual and both are my second time doing them. They're such great value as you get more than you pay for even with shipping costs and you get so many ideas from fellow students plus the "classes" themselves.
This is a much smaller event with only 5 kits and 6 classes, the final class is a mashup of all the kits plus we get some sway in our box as well. this time we received their pokey tool (aka embellishment wand). It's an awesome tool as the ends don't fall off when you look at them (unlike my Trinity Stamps one which does and I find really annoying). Also the pokey end is actually rounded, it's small enough to go through the holes but not sharp to stab you. It also came with 2 replacement wax tips in the box, so another plus. Plus our instruction booklet.
I also got a new generic stamp set, which has BEAUTIFUL fonts and sayings, some new ombre glitter drops (Sparkle and Shine) and a pack of foiled sentiment strips, watercolour papers for our watercolour class (class 4).
Last but not least all the stamp sets, dies, washi tape and stencils for the other classes, packed in individual bags.
The only thing you have to provide is your card stock and basic stuff. The team at PFS always use Hammermill and I am fortunate that I can now source this at Krafters Cart in NZ. Krafters Cart also stocks the Pinkfresh Studios current range and Meetu is very obliging if there is something you want from past releases.
Saying that the first class kit has NOT been released as yet but in time all items we receive are released.
This is a snap of my first class's stamp set, matching 4 stencils and 5 piece die-set. This class was taught by Heather Hoffman from Pinkfresh Studios.
Saying that the first class kit has NOT been released as yet but in time all items we receive are released.
This is a snap of my first class's stamp set, matching 4 stencils and 5 piece die-set. This class was taught by Heather Hoffman from Pinkfresh Studios.
The classes are very relaxed and you have 2 hours to create the 2 cards, they are extremely easy to keep up with in my experience. My booklet has instructions to make one more card which I will do when I finish all the classes plus the great thing about my box getting trapped at Customs somewhere and why all of us from down under missed out on doing the event live, is now we can do the bonus card and also attempt to make any that fellow "students" have created that catch our eyes too. Sometimes it's good to be late! It was about 10 days too late for me to do live (I was the last registrant to get their kit, fellow kiwis were 2-4 days earlier than me). At the time I did receive it, it was much too close to my event with SCT to attempt to start on it.
Some cool tips/techniques I learnt from my first class:
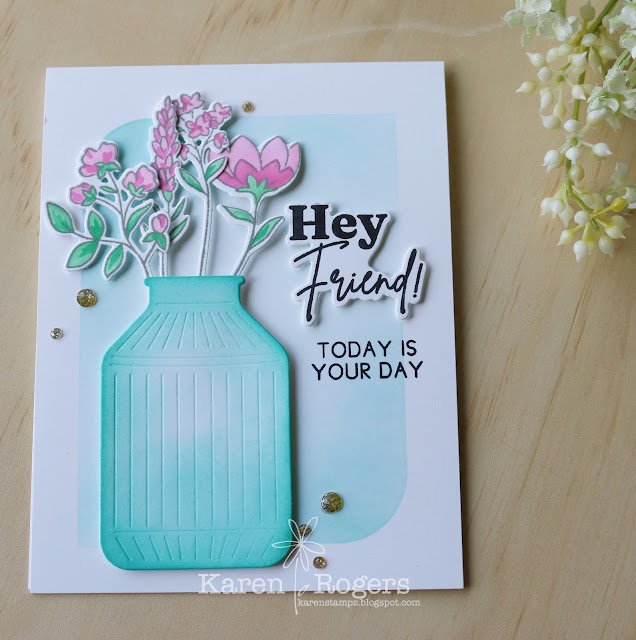
- leave your blending in the middle of the jar non-existent to make it look curved, slightly transparent
- when we attached our stemmed flowers we had a plain white jar which we hadn't coloured up and attached some removable tape and then we could attach the flower stems on top and get the arrangement how we liked it. We could tweak the stems/flowers very easily before adding our real jar on top
- one of the cool things about PFS is that you stamp one image and when you die cut it out it gives you all 4 images (or how ever many are in that set) which makes it a lot easier, Heather also reminded us that once you have your photopolymer stamp on your stamp positioner window just put the die over the top of it to make sure you haven't stretched your stamp pulling it off the backing sheet, it should fit perfectly inside the die, otherwise, lift gently and try again, this is only important if you are die-cutting out
- this class is also where I learnt the tip about using a bubble wrap/mailer bag to die-cut out very detailed dies with lots of chads
The stencil for the set of flowers makes it very easily to add the darker highlights as stencil 3 and 4 are just a wee slither to add the next layer.
I started nearly 2 years ago buying the PFS inks as I love stencils and I hated my SU! yellow inks when I saw how beautiful the PFS inks were in comparison I started buying them all, a set or a two at a time. They currently have 12 sets of 4 inks in each set and I am looking forward to them introducing another 6 sets to fill in the gaps.
Pink inks used: Sparkling Rose and Bubble Gum. This is the 2nd and 3rd darkest pink currently. I used Sparkling Rose on my big YOU card the other day to do colour blocking which you can see HERE if you missed that blog post. The Sky Blue ink from that post can be seen in card 2 too.
Green inks: Meadow and Emerald City (again 2 and 3 in intensity).
Aqua blue inks: Ocean Breeze, Aquamarine and Mermaid Cove (1, 2 and 3 in the range).
We made the second card a bit more fancy using the braided rectangle die and then each flower is coloured with different colours and a darker colour to add the depth for the top layer. I mucked up the colours a tad and made my heather yellow and the buttercups violet ;) But still a pretty wee bunch of flowers for my jar.
We made the second card a bit more fancy using the braided rectangle die and then each flower is coloured with different colours and a darker colour to add the depth for the top layer. I mucked up the colours a tad and made my heather yellow and the buttercups violet ;) But still a pretty wee bunch of flowers for my jar.
Again we have blended "brown" inks over the jar leaving the middle very lightly blended; inks used are Warm Buff, Doe and Espresso (1, 2 and 4). The sentiment has been stamped with Espresso. I chose to use the sentiment "thanks a bunch" from our kit swag (Beyond Happy stamp set) as I thought it was perfect for a bunch of flowers card.
Orange inks: Peach Fuzz and Apricot (1 and 2)
Orange inks: Peach Fuzz and Apricot (1 and 2)
Blue inks: Sky Blue and Summer Shower (1 and 2)
Violet inks: Soft Lilac and Candy Violet (1 and 3)
Yellow inks: Lemon Whip and Sweet Mustard (1 and 3)
Green inks: Fresh Pear and Grassy Knoll (1 and 2)
Well that was a lot of fun and I am very happy to finally start on my February classes, when I did their Holiday event last November there was no problem with receiving our kits quickly and I am glad the problems with shipping happened for this kit in February and not for the Holiday cards in November as those cards are time-sensitive and needed for Christmas. They are going back to treating us for "down under" as "down under" and "not as rest of the world" i.e. Europe as that did not work at all for us.
It's another grey gloomy day in NZ so thinking cap needed for a few challenges and getting onto Mother's Day card (for Pete's mum).
Have a good day all.
Have a good day all.
✿ Karen ✿


No comments:
Post a Comment
Thank you, I appreciate that you have taken the time to visit my blog and to leave a comment, I really do enjoy reading them.
In line with new Data Protection legislation (GDPR) by commenting you do so in the knowledge that your name & comment are visible to all who visit this blog and thereby consent to the use of that personal information for that specific purpose.
Karen