30 July 2023

Craft Roulette #173 and #174

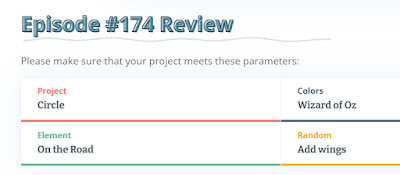
Not sure what happened last weekend but I didn't share my submission for episode 173 maybe as we had friends staying so all a bit of a rush job. This week I've ended up with a very busy card as I decided I wanted fairy wings and because I wanted a circle "die-cut" because of the roulette spin, it is all a bit busy but I'm still pretty happy how it looks. It is magical. It's a foggy  cold day in Hamilton today so not the best picture  but determined not to forget this week. 


Looking at the parameters wings and Wizard of Oz I decided fairies with paper dresses made from some old gingham DSP from SU! (?Balmy Blue). Googling what are Wizard of Oz colours it seemed Dorothy had a blue gingham dress and then there were regions and colours; blue (Munchkins), yellow (Winkies), red (Quadlings), green (Emerald City) and purple (Gillikins), It's actually quite fascinating as it's all at the back of my memory somewhere plus of course the yellow brick road.

Supply List:
Stamps (all LF): Fairy Friends, Gleeful Gardens (snail), All the Clouds (clouds)
Inks: Buttercup (C9), Harbor (C9), Parsley (C9), Poppy (C9), Memento Tuxedo black
Paper: Neenah White and Xpress IT blending card stock
Other: Circle die (HB), Geotiles embossing folder (SP), Signo white gel pen, Prisma glitter (LF), grass stencil (LF), Copic markers, Everyday sentiment banners (LF)


Last week's episode I created a card not really me but both Pete and myself ended up saying that is was rather cool as quite tranquil.


Supply List:
Stamps: Oceanfront (SU!), sentiment ?came from a Pinkfresh Studio set
Inks (all PFS): Mint, Sky Blue, Warm Buff, Metropolis
Paper: Countryside Inn 12 x 12" DSP (SU!), Not Quite Navy (SU!), light brown woodgrain (LF)
Other: Stitched rectangle die (LF), shadow box card theater add-on (LF), painted texture embossing folder (SU!)


✿ Karen ✿

29 July 2023

Monochromatic Cards

I think monochromatic challenges are becoming my nemesis. AAA Cards latest challenge is "monochromatic", the last time I attempted one of these challenges I was relatively happy but felt my colours I chose were too dark. 

My first card wasn't right for this challenge so back to the drawing board, I'll show it at bottom of post as I think "I saved it from the bin". 

I actually really like take two and it's quick and easy. I've used die cuts of coordinating pinks to make an ice cream, for all of you in the Northern Hemisphere sweltering, this is something I'm sure you would enjoy at the moment.


I've added Distress Rock Candy and Prisma glitter to the 2 layers to make it look icy, I hope.


Supply List:
Paper: Blushing Bride (SU!), Flirty Flamingo (SU!), Wheat (C9)
Dies: Little Bits Ice-cream Cone (TE), Painted Enjoy (SSS)
Other: Distress Rock Candy glitter (RNG), Prisma glitter (LF)
Challenge: AAA Cards #245


Now my original idea was to mask off a circle and then apply a pale lilac "brushstroke" using my new Brushstrokes stencil from SSS and then stamp a simple flower in black but I wasn't that happy with it after the first step  ?too big a circle; ?brushstrokes too far apart; ?too dark a colour. 

But I was persevering on and looking through my stamps for a simple flower I spied my new AALL and Create stamp I picked up at SENZ a few weeks ago #842 Boots On, which I stamped on with a grey ink as I knew it was busier than my original concept. I then coloured the crocus flowers with my ZIG real color brush markers and at this stage it was going in the bin but knew I wasn't using it for the challenge. Much later on I roughly coloured it and made it colourful and I think it's quite fun and I love the stamp and the sentiment "don't be like the rest of them, darling" but maybe not with brushstrokes going through them all.


As always AAA Cards gives us lots of time to play along so you still have 8 days to join in on the fun but do check out the other cards on display, there is no doubting monochromatic can be really effective.

✿ Karen ✿

26 July 2023

Been too long between glimmering all the things

I've been glittering all the things lately but I saw the last Pinkfresh Studio Craft Hour hosted by Jeff Lindberg showing how to make a Yaz card, Yasmin Diaz that is and I loved the fold and thought at the time that's a cool fold and even though I don't have the stamp set they were using I can play with my Small Butterfly set from Pinkfresh Studios as I was also thinking about the latest AAA Birthday Card Challenge to use "butterflies".


Now the fold they taught in the video and it maybe worth watching (it's only an hour long) is really similar to a pinwheel tower card without the tower. It's a freestanding card that fits in an envelope.

Cutting and scoring: 
  • TWO pieces of white card stock 5" (h) x 4-3/4" (w), score at 1/2" and 4-1/4" - in one piece die-cut out a shape and make a frame I used my Honey Bee stacked circles to die cut out a circle and make a frame
  • Four A2 panels (4-1/2" x 5-1/2") scored at 2-1/8". Yaz used 2 colours as I did but could also use all the same colour or even white. 
  • adhere the A2 panels to the alternate colour to make "your pinwheel"

  • attach the white panels from step one


  • The only other cutting dimension you need to make note of is the pop-up bit to attach the middle circle which is 4" x 3/4"; scored at 1/2", 1", 1-1/2", 2-1/2", 3" and 3-1/2" inches.
  • you glue this "pop-up tag" either side of the score line and attach the die-cut you are using directly to it.
  • I also made the same mistake as Jeff I added my circle frame all around my opening instead of attaching only at top and bottom so the frame floats too but it's still pretty and worked.

I think you can see my shimmer and all the butterflies better here than on the actual card.


I also decorated the back of the card where you can write your message and I have some more butterflies stored for future use too.


Supply List:
Small Butterflies (PFS): hot foil plate, stencils and dies
Ink (all PFS):  Mint, Lemon Whip, Soft Lilac, Warm Buff, Doe
Paper: Neenah White #110, Lilac (C9), Sea Glass (C9), Memory Box delicate pastel glitter paper
Dies: Sweet stacks: Circles (HB), Curvy Leaves (PFS)
Other: Silver glimmer foil (SP)
Challenge: AAA Birthday #51


✿ Karen ✿

22 July 2023

SENZ 2023 - mixed media class with Beata and Create day 2

I was really fortunate to squeeze in TWO full mixed media classes with Create and Beata Higham at SENZ last weekend, one on Friday afternoon and one on Saturday afternoon. At the second class the cost also included the fab AALL and Create stamp set #898 See You Soon with the fabulous cyclamen image. You can see my blogpost about the first class HERE if you haven't already seen it.

The first card was relatively straightforward we blended our backgrounds with Lost Shadow, Dusty Concord and Villainous Potion distress oxide ink. We then stamped the cyclamen image around the edge with Versafine Clair Nocturne and also shadow stamped with  Morning Mist ink. Random stamping of the background stamp from Miniatures #756 AALL). Water splats/mist has been added with a mister bottle

We also stamped the image 3x on white card stock with the Nocturne ink. The images on the white card stock have been watercoloured using Wilted Violet distress ink and then fussy cut out and detail added with a fine white Posca pen (0.7mm) and attached directly on top of the "black stamped images". We then added a wee mouse from Cute Mouse #811 (AALL). Then a few white splats, I used my Copic white. The panel has been matted on a black mat to finish off.

I made a few boobies with the 2nd card but happy how it all turned out, we masked off an area approximately 1.5 inches from the bottom with some Post-It- Note tape and did a soft ink blend around the Post-It-Note tape. I had just purchased Victorian Velvet so I used that and Dusty Concord but I think Beata used Dusty Concord and Worn Lipstick. After blending I forgot I was supposed to protect the bottom as well as I stamped and shadow stamped the Cyclamen again in Nocturne and Morning Mist so I had a bunch of cyclamen stalks and leaves down the bottom which I didn't really like so I covered it up with some AALL and Create washi tape #40 Wordline which I think looks really good, so a good mistake to have made!!

This time we had to cut out the whole Cyclamen and watercolour up. I decided it was best to do at home and not rush it so I ended up using my Zig Real Color brush markers to watercolour up and they are very vibrant and a real pop of colour. The "taped off area" was stamped with the base of a row of Quill Pens (I can not recall whether this was a Lavinia stamp or a AALL and Create stamp) using Morning Mist ink. The wee bird came from the middle of a sentiment Quill Ends #908 (AALL) Create. Bit of distressing/cutting the border in places to show the black mat. 

I loved both the cards I made with Beata and must admit when I returned home Saturday night I was regretting not staying and doing the Sunday class with her but it was great to be home to my Pete and my own bed plus a fire!! 

Well that's the end of my SENZ classes for 2023, they were all fabulous and different. I am very thankful there were more card classes on offer this year so I "didn't have to do a scrapbook page". 
✿ Karen ✿

21 July 2023

SENZ 2023 day 2 - Fun with Chick at Scrapbook Central

Another early start on day 2 of SENZ with the Scrapbook Central crew.

I was rapt that before my mini class at 10am with Chick Mitchell aka Inky and Stampy that she was running a make n' take on the Scrapbook Central stand. I have to be honest this is the only make n' take I made and I actually love it. The dotted background has been dry embossed using one of their own brand Celebr8 stencils and the brown embossing mat, We have then ink blended Peacock Feathers and Speckled Egg distress oxide in places, leaving gaps then spritzed with Frost Shimmer spray and left for approx. 20s before dabbing off excess with paper towel. Dried with a heat tool. The die cut leaf comes from the Sissix set Skeleton Leaves. Last but not least the thankful comes from a Celebr8 laser cut embellishment, there's normally a dozen or so words on an A2 panel and also has been sponged with Peacock Feathers and spritzed with the Shimmer Spray. When I got home I mounted the wee tag up on another Kraft rectangle and then tried to use my Just Stitched Double rectangle dies but unfortunately it was a tad too big. I couldn't trim down the original make n' take tag as I had all the embellishments stuck on top so I distressed the edge a bit so you can just see the outer stitching winking at you. This is a fab thank you card and I think I'm going to have a go at making a bunch. I love the details in the skeleton leaves so bought the die set.


Then it was time to start on the fab mini class, this was the reason I stayed on as "Lawn Fawn" plus "Copic colouring" I was in! 

I love the way Chick has created interest by using a shimmer vellum under the white puffy clouds. We have ink blended the background with Distress inks again and she also did it differently than I normally do; in a nutshell we only wanted about half of the card blended and rather than doing layers we have blended various blues in no particular pattern in small circles but also blending into each other, then spritzed with Shimmer Spray (I only had the Sparkle one before but now also have Frost). The wee Hello die cut comes from Memory Box. Then the large balloon from Lawn Fawn's Flying High stamp set has been coloured in with BGs and C markers. I really like the grey stripes, it's different. Chick also provided us with full instructions and alternative balloon colouring. This is the second class I have done with her (I did one last year at SENZ 2022 too) and really enjoyed that one too. 


Well I feel like I got 2 cards for the price of one and love them both, the tag took about 15 minutes to make. Huge thanks Chick for some more fabulous card projects.

✿ Karen ✿

20 July 2023

SENZ 2023 - mini class with Patricia and Krafters Cart day 1

Continuing on with my crafty adventures at SENZ and the Christmas card mini class blew me away. I can't believe what great value the class was ($30 for 3 FABULOUS cards) and I can't believe I managed to do it in an hour. If I'm honest I take an hour to make one card. Patricia has done all the hard work for us, she has die cut out all the cover plates, borders and so many die cut pieces, so much so she actually broke the handle on her die cutting machine.


Patricia Manhire is a very talented crafter from Lower Hutt and is on many design teams and makes the most dreamiest of cards. I probably should have come back for my 3rd day's attendance and did the other 2 mini classes she was also running as they too also looked fab. It's always a balance act to try and support the businesses you love and do the classes that speak to you. Doing classes is cheaper than shopping plus you learn new techniques IMO.

The cards are made up of Sunny Studio, Spellbinders, Pinkfresh Studio, Honey Bee and Altenew products; companies I already love. 

Onto the fun stuff making the cards we used distress oxides to colour up the die cuts. There were 3 pinks, 2 yellows and 2 greens. Spun Sugar, Worn Lipstick and Festive Berries; Squeezed Lemonade and Mustard Seed; Twisted Citron and Mowed Lawn. Two of the cards we have also ink blended the layers. I added my red Stickles on when I got home to the berries, my collage shows with and without.

The cards came together really easy once the blending was done and surprisingly the blending didn't take too long at all; Distress Oxides made it super easy to blend.


What fabulous cards and I am very happy that I now have started on Christmas for 2023!! Thank you Patricia that was an amazing class.

✿ Karen ✿

18 July 2023

My ATC cards for Craftirific 2023

This is an annual retreat where some crafty gal pals get together for a weekend of crafting, the majority are into scrapbooking, some are into off the page projects which can be quite big, some knit, one does mosaics and a few of us make cards.

We all like to eat lollies, eat good food, shop, craft and chat and it's a great girly weekend. Unfortunately I came down with a head cold and had to come home a day early but I still got 48 hours of quality crafting time and finished off a lot of projects.

It's also tradition to swap ATC (artist trading cards) and the theme this year was Christmas. I ended up using my favourite stamp sets from last year Ugly and Bright plus Yeti or Not (both Lawn Fawn) and downsizing Card 5 which you can see HERE for my ATCs this year. We had to make 15 so I used different colour combos and different cute critters on each tag. I also gave everyone a wee tag they could add to the back of the card to cover up the ATC info with a "To: and From:" stamped on it so they could use it as a gift card. It's definitely going to be one of my gift card designs for this year as I have so many stamped and coloured images as I really only needed one critter/card plus tree/s and presents to make it work.


The Lawn Fawnatics current challenge is Christmas in July and OMG there are some amazing inspiration for cards and tags. I think I maybe CASE-ing a few as they are so stinking cute. The challenge has just kicked off so hopefully I'll have a go again re-entering with a full sized card or 2 as well. But this is one challenge I try to enter as someone is picked randomly to win a $50 gift card from the Lawn Fawn shop, and it could be me or it could be you if you enter too.


✿ Karen ✿

SENZ 2023 - mixed media cards with Beata and Create day 1

SENZ is the longest running local crafting show and I have attended every year since I discovered my love of stamping, in the early days I was part of my SU! team's stand but lately I have just been an attendee and I love to take classes with Create as they normally push me outside my comfort zone and have dabbled in all sorts of fun inky techniques over the years with Fiona Caldwell and her team.

I am rapt with how my TWO mixed media classes with Beata Higham turned out. I'll just blog about the first class on Friday I took as that is wordy enough but all 4 cards are collaged below.


The first class we ink blended a background and then using stencils we added or removed colour.

I used my own inks so my colourings maybe different but similar to how Beate demonstrated her cards.


This was the first project taught and I was very pleased we were using one of the AALL and Create stamp sets I picked up last year Friendship Florals #648. The Script stamp (Indigo Blue) is an old one from my stash, other stamps are Wild Summer Flowers (Lavinia) and Wreath Flourish Left or Right (Lavinia). I have blended the background with 2 of my Catherine Pooler inks Catching Rays and Do-Si-Do. We have sprayed a Divine stencil (Lavinia) with a shimmer spray - I think I used Golden Temple Mysticals (Lavinia) and then turned the stencil over "stamped" the lower RHS corner. The other 2 places the stencil is used I have ink blended through more pink ink on the pink background and the yellow ink on the pink background. Otherwise various texture stamps have been randomly stamped at the top with Morning Mist Versafine ink. The large sunflower has been cut out twice and ink-blended. White details have been added with a white Posca gel pen 0.7mm or white embossed. This card is very bright and cheery IRL.


The second project we ink blended a background using Distress Oxides (Bundled Sage and Shaded Lilac), this time I have used Leaf Trails stencil (Lavinia) and spritzed with water, turned over and stamped the background to remove the colour. We have then stamped the Violet #574 (AALL) directly to the background and to another piece of card. The leaves and violets have been fussy cut out and coloured with Distress Water Color pencils (Peeled Paint and Shaded Lilac). The background stamping was with Versafine Morning Mist again using Miniatures #756 (AALL), the butterfly comes from Spread Your Wings #729 (AALL). I'm not sure where the sentiments come from but the AALL and Create stamps are full of sentiments, we were given the strips as part of our kit . I have added dots with my white Nuvo at home I should have just made them on my silica mat as the ones I did on it were perfect, I have also splattered with Copic White ink.

I'll be back to share more of the fab cards I made at SENZ shortly.
Karen

17 July 2023

Craft Roulette #172

I am sad I missed doing Craft Roulette last weekend as I came down with a terrible head cold whilst away. I was actually looking forward to doing it with the limited supplies I had with me, I thought that would be rather fun. This week I was also away Friday and Saturday but found time to have a wee play yesterday afternoon and the card came together so easily once I worked out what I was doing for the parameters.


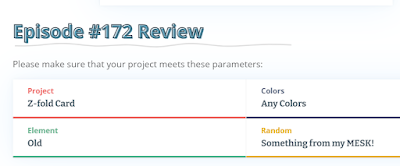
This week's parameters were:


The "old" element was what made me think hard, I was looking for an old truck and thought about using my On To Retirement set again which I love with the "older" people images when I had a brainwave, well I thought it was a brainwave, Santa is very, very old. So the Z was under control, any colors was under control and my desk was a MESK after returning from SENZ and finishing of the card projects I started at classes or as make and takes there.


Once I had the general concept in my mind what I was doing I started looking through my Christmas DSP and I have to be honest I don't actually have a lot but I found a folder with the Christmas DSP from the first SU! catalogue in NZ and was going to use that, I could see Cranberry Crisp and some kind of "Thyme" calling me but in the same folder was a few sheets of beautiful DSP that I bought about that time with bright pink glitter, it was called Entwine (Bella!  Kraftastic Papers), I've used a shiny bright blue one before in cards but this was my first cut of this sheet and isn't it adorable and also very old, bought approximately in 2008. It made it easy to chose what was coming from the MESK then, I had bought a bottle of Frost shimmer Spray at SENZ, I use my Sparkle shimmer spray a lot but it was the first time I had seen a Frost version, and its an opaque shimmery white, perfect for snow.

To match the Kraft in the DSP paper my Crumb Cake card from SU! would work but I really like working with American measurements for my card making now, so I was very relieved my mixed pack of cardstock from Concord and 9th Wheat was a great match and Dragonfruit in that pack is also my brightest pink cardstock. I actually sponged the sky onto the Wheat cardstock which made it slightly darker. I've used Tumbled Glass and a tad of Salvaged Patina oxides. I then cut a few stitched hillside borders (LF) from white cardstock and used what was left on my blending brush to add a hint of blue and then added Prisma Glitter to make sparkly with my Sakura glue pen. I have used my old retired Layering Circle framelits from SU! too, so another another old thing and this is my 4th Christmas Card made for 2023.

My wee images I have Copic coloured on Xpress IT blending card stock and they come from Ho-Ho-Holidays (Lawn Fawn). 

An easy Z-card is just the front panel folded in half and you can add any shape to normally add your stamped image etc.


Up close and sparkly! Copics used (darkest >> lightest):
Bag and Santa suit: RV19/17/55
Skin: E13/11
Blues: B34/32
Greys: T8/6 and T4/2/0
Yellow: Y17

Well this turned out to be so funn, I may have to make a few more cards for my stash.
✿ Karen ✿

13 July 2023

Kai is very cool

In New Zealand kai is the Maori word for food but it's also the name of this really cool fox surfer dude by Purple Onion Designs. AAA Card challenges has a fun challenge for the dogs/puppies but they also say wolves are dogs and so are foxes, coyotes and hyenas.

My "Kai" had just landed in my letterbox so I thought yah I can ink him up for this challenge. I also tried something different to colour him up. I normally use my yellow red Copics to colour up foxes but watched a video by Kara where she used the E17/13/11 and then layered on R05/02/00 and back to the E's - OMG her colouring is magical. I'm pretty happy with my attempt (this is actually my 2nd go the first one I had too much bleed) and think it's more realistic than a YR marker.


Purple Onion Designs are red rubber and unmounted so they are actually quite cheap to buy, the downside is you have to stamp and build a scene directly which can be tricky when it's not a clear stamp or you have to fussy cut them out by hand which in all honesty isn't that hard. I have also run a Memento black marker around the edges after cutting the image out. I have made the "sand" with Antique Linen distress oxide and some splatters of Vintage Photo. I have stamped a sentiment from On the Beach (LF) with my new Pinecone Versafine ink pad and clear embossed it. I've just been up to Auckland and thought I love my Nocturne ink pad I should buy myself a brown and a navy ink too for my sentiments.
I popped Kai up on 1mm square foam from Spellbinders; I love them they give you just a wee pop up.

At least another week to join in with the fun at AAA and so do pop over to see the other really cute dog cards, they even make this cat lover smile :)


✿ Karen ✿

10 July 2023

Mushrooms and Terrariums

I have been away at a Crafty retreat at a friend's place and took with me lots of projects that hadn't been started as I didn't have to think too much about what to take with me. I actually achieved a lot (including the number of lollies I managed to scoff) until I got a head cold, which apart from making me feel bluh the nasal drip was interfering with bending over the card.

This project is from February's Pinkfresh Studio (PFS) Create and Connect event and those of us from down under never got our kit boxes in time, they seemed to be stuck in Germany for months which was an unmitigated disaster IMO.

I love PFS and I love there cards but I think there is a design flaw in the stencils for The Magic is in You. Stencil 1-3 are the mushrooms, stencil 4-5 are the greenery and accents and when you go to use stencil four there is nothing to align it all up with stencil 1-3 and it has to be perfectly lined up as the die cuts it all out in one pass. I was organised for my weekend away and had cut out all my layers as per our guide and the instructions for this class were just an A2 card layer needed. For starters if you do the stalk with the A2 layering guide the top of the mushroom caps are outside the A2 border so I had to use 2 bits of cardstock for each card.

For future I would cut my cardstock to match the stencil size and use my Misti to layer it all up. Saying that I think my cards turned out awesomely.
 

This class was taught by Lea Lawson and the make and take is the Terrarium (which is a stand-up card) and was designed by Heather Hoffman.


The terrarium is cut out of Vellum and gold mirror card stock, we have lightly blended the vellum terrarium with Ocean Breeze ink. Other inks used Candy Apple, Misty Coast, Rocky slope, Olive and Evergreen. Ombre glitter drops and the accents are just plain white card stock.

The Rounded and Braided rectangle die is cut directly into the card front.


No terrarium this time just 2 different layers of the rounded and braided rectangles. Ink colours Warm Buff, Peach Fuzz, Coral Reef, Aquamarine and Mermaid Cove. The sentiment comes from the Beyond Happy sentiment stamp set which we were also given as part of our kits.


This actually might be my favourite card, we have die cut 2 terrariums, 2 mirror gold bases and 2 white card base. The second terrarium die cut is scored at 1/2" from the top and attached to the other die cut to make a free-standing card. The gold base is added to front and back of the card and the white bases are added to the inners to line up with gold bases.

Ink colours used Warm Buff, Doe, Apricot, Marigold, Meadow and Emerald City.

I think all 3 of these cards pack a big wow and created with stencil set and one piece die that cuts them all out, it is actually quite cost effective too.
✿ Karen ✿

8 July 2023

Another Platform Card

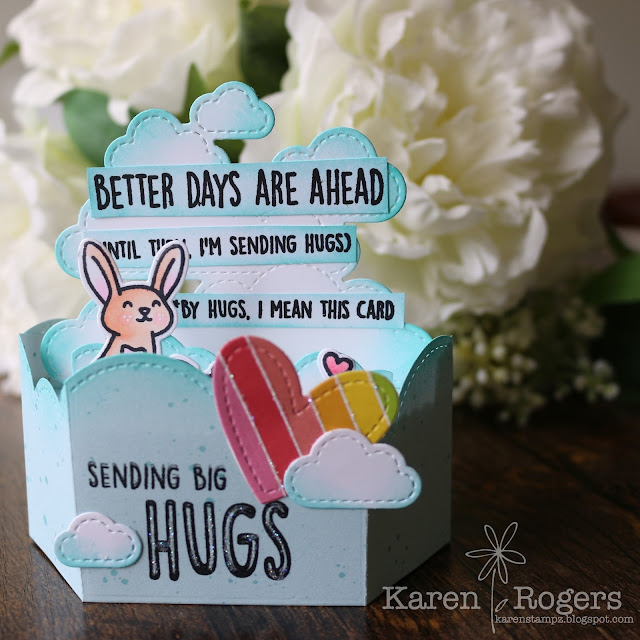
Lawn Fawn have the most fabulous interactive dies and my friend Sarah and myself both think the pop up platform is the "bees knees" it's actually really easy and packs a real wow.

So I had to laugh that Jenn Shurkus gave us all the bits cut out to make one including the new pop-up clouds and cloud wrap around. Lawn Fawn donated for our Retreat Kit the Better Day set which I thankfully didn't own and isn't that wee bunny just adorable.

Now if someone could help me photograph a pop-up platform card I would be rapt but it folds down so you can post in a standard envelope.


✿ Karen ✿